Introduction
Oil painting is a deeply rewarding art form that allows artists to capture the richness, depth, and emotion of their subjects. In this blog, we’ll dive into the detailed process of creating a portrait using oil paints, inspired by a live painting session. Whether you’re a beginner looking to learn the basics or an experienced artist seeking to refine your techniques, this guide will walk you through every step, from setting up your workspace to adding the final touches.
Materials Needed
Before starting, it’s essential to gather the right materials. Here’s a comprehensive list of what you’ll need:
- Oil Paints: Titanium White, Cadmium Yellow, Cadmium Orange, Crimson Red, Permanent Alizarin, Ultramarine Blue, Raw Umber, and Black.
- Brushes: A variety of sizes, including small detail brushes and larger blending brushes.
- Canvas: A primed canvas (9×12 inches or larger). For beginners, inexpensive canvases can work, but applying two layers of gesso is recommended to prevent the canvas from absorbing too much paint.
- Palette: For mixing colors. A wooden or glass palette works well.
- Mediums: Linseed oil or other oil painting mediums (optional). These can help thin the paint and improve flow.
- Reference Photo: A high-quality photograph of your subject, ideally printed at the same size as your canvas for easier comparison.
Step 1: Setting Up Your Workspace
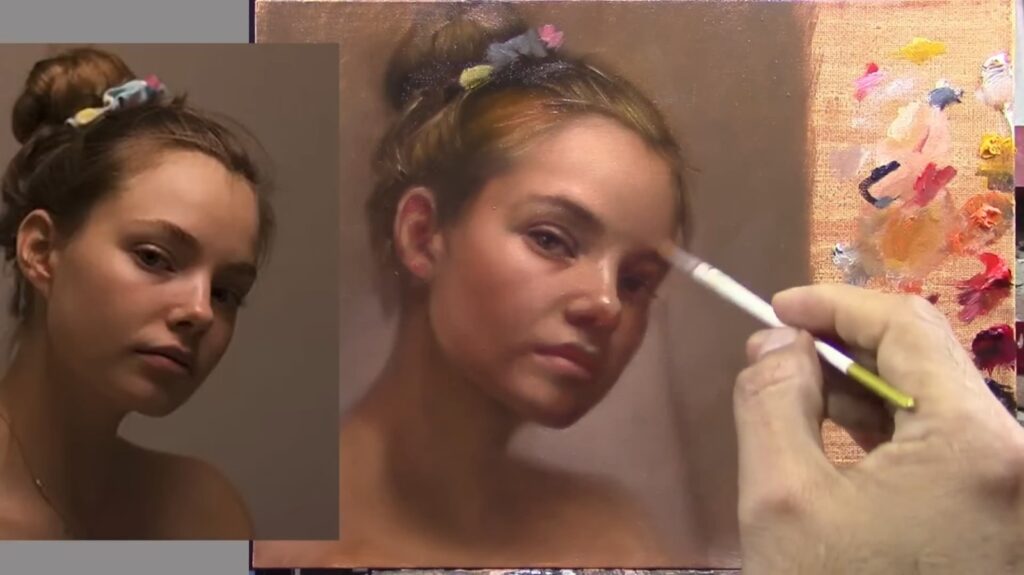
A well-organized workspace is crucial for a smooth painting process. Place your canvas on an easel and position your reference photo next to it. Ensure your palette is within easy reach, with your paints arranged in a logical order (e.g., light to dark). Having a large reference photo is particularly helpful for beginners, as it makes it easier to compare shapes, values, and proportions.
Step 2: Sketching the Portrait
Begin by sketching the basic outline of the portrait using Raw Umber. This earthy tone is ideal for establishing the darker values and shapes of the face. Use a medium-sized brush to block in the shadows, focusing on the eye sockets, nose, and jawline. At this stage, don’t worry about details—focus on capturing the overall structure and proportions.
Pro Tip: Squint your eyes while looking at the reference photo. This helps simplify the shapes and values, making it easier to identify the darkest areas.
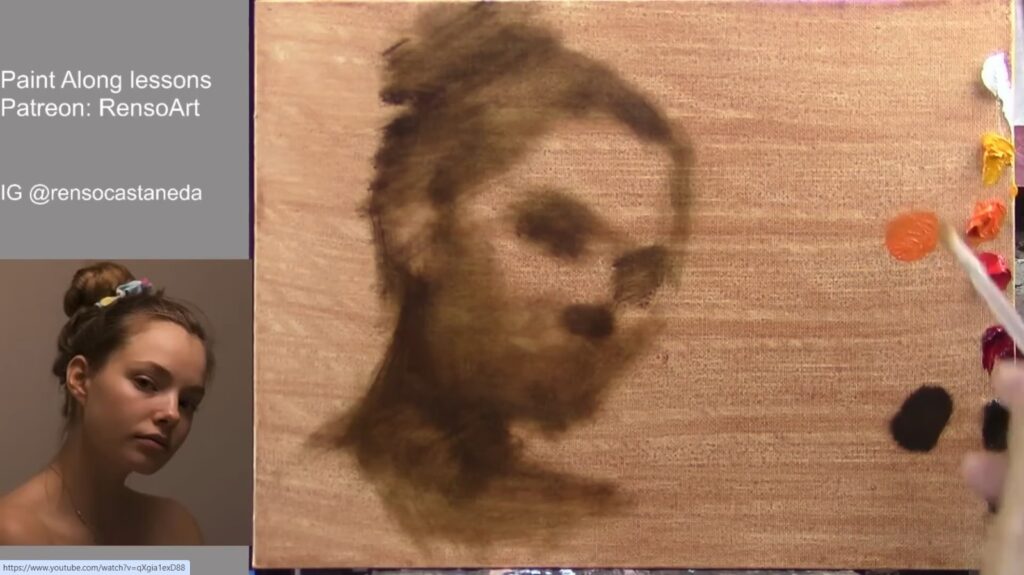
Step 3: Blocking in Dark Values
With Raw Umber, continue to block in the darker areas of the face. Use a larger brush for broader strokes and a smaller brush for finer details. This step is all about establishing the foundation of your painting. Remember, oil painting is a layered process, so it’s okay if the initial sketch looks rough.

Step 4: Mixing Skin Tones
Creating realistic skin tones is one of the most challenging aspects of portrait painting. Start by mixing a neutral base using Cadmium Orange, Raw Umber, and Titanium White. Adjust the mixture by adding more yellow or red depending on the subject’s complexion. For warmer tones, add more Cadmium Yellow; for cooler tones, add a touch of Ultramarine Blue.
Pro Tip: Keep your skin tone mixtures slightly muted. Real skin rarely has overly saturated colors, so adding a touch of Raw Umber or white can help tone down the intensity.


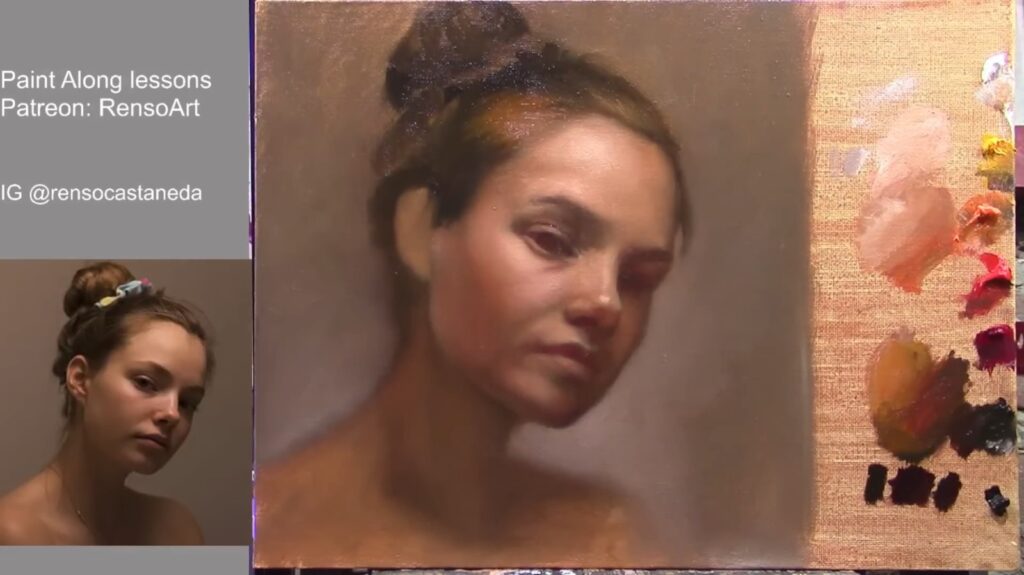
Step 5: Adding Mid-Tones and Light Values
Once the dark values are in place, start adding mid-tones using your neutral skin tone mixture. Focus on areas like the cheeks, forehead, and neck. Gradually introduce lighter values by adding more Titanium White to your mixture. Pay attention to where the light hits the face—typically the cheekbones, nose, and forehead.
Use a clean, dry brush to blend the edges between light and shadow. This creates a smooth transition and adds a sense of realism to the portrait.
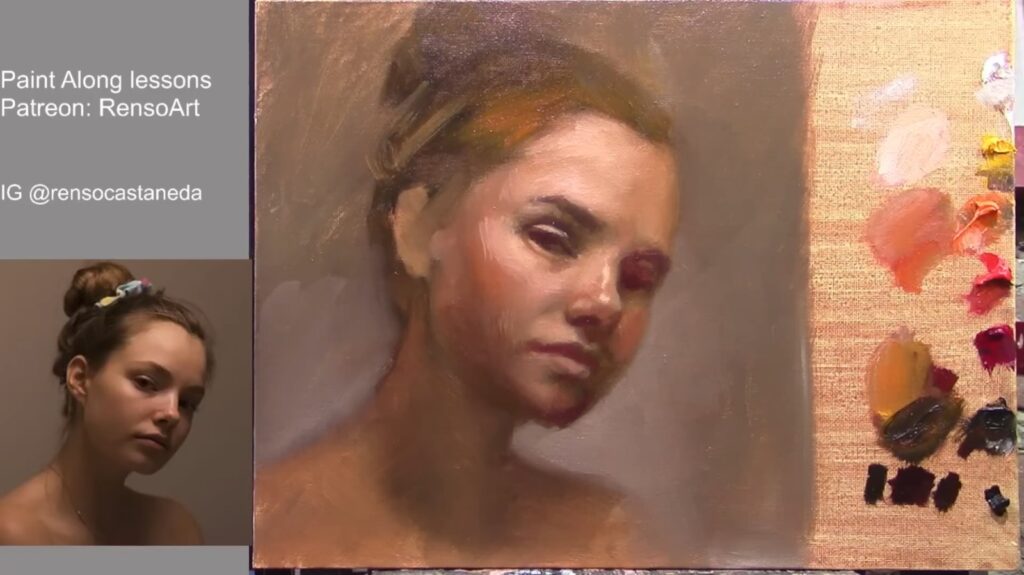
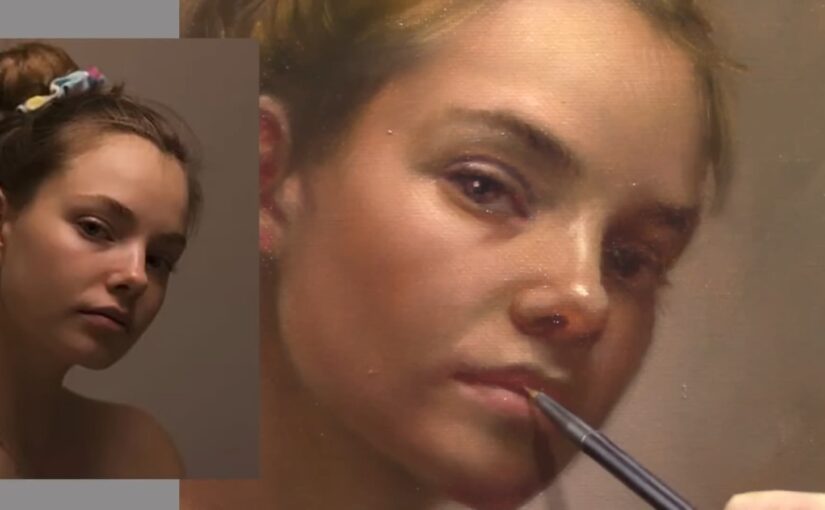
Step 6: Refining Details
As the painting progresses, switch to smaller brushes to refine the details. Focus on the eyes, lips, and nose, as these features are crucial for capturing the subject’s likeness. Pay attention to subtle color variations in the skin, such as the reddish tones on the cheeks and chin, which are caused by blood flow.
Pro Tip: Use your fingers to soften edges, especially in areas like the cheeks and jawline. This technique can create a more natural, blended look.
Step 7: Painting the Background
The background should complement the portrait without distracting from it. Mix Raw Umber and Titanium White to create a soft, neutral tone. Use a larger brush to apply the background color, blending it seamlessly with the edges of the portrait.
Step 8: Final Touches
Add the finishing touches to bring the portrait to life. This includes adding highlights to the eyes, lips, and nose, as well as refining any areas that need more contrast or detail. Use a small brush for intricate work, such as eyelashes and fine hair strands.

Q&A Section
Q: What’s the best way to practice oil painting for beginners?
A: Start by copying photographs or master paintings. Place the reference image next to your canvas at the same size to make comparisons easier. Focus on values and shapes rather than details in the beginning.
Q: How do you mix skin tones?
A: Begin with a neutral base of Cadmium Orange, Raw Umber, and Titanium White. Adjust the mixture by adding more yellow or red depending on the subject’s skin tone. For warmer tones, add more Cadmium Yellow; for cooler tones, add a touch of Ultramarine Blue.
Q: Can I use cheap canvases for oil painting?
A: While you can use inexpensive canvases, it’s recommended to apply two layers of gesso to prevent the canvas from absorbing too much paint. For best results, invest in a high-quality, oil-primed canvas.
Q: How do you create soft edges in oil painting?
A: Use a clean, dry brush to blend the edges between light and shadow. You can also use your fingers to soften edges, especially for areas like the cheeks and jawline.
Q: How long should I wait before glazing an oil painting?
A: Wait at least a week or until the painting is dry to the touch and no longer sticky. The drying time depends on the thickness of the paint and the climate you’re working in.
Q: What’s the best way to blend acrylic paints for skin tones?
A: Use a spray bottle to keep the paint moist while blending. Alternatively, use slow-drying acrylics or a blending medium to extend the working time.
Q: How do you avoid overworking a painting?
A: Know when to stop. Overworking a painting can lead to muddy colors and loss of detail. Take breaks and step back to assess your work from a distance.
Conclusion
Oil painting is a journey that requires patience, practice, and a willingness to learn. By focusing on values, proportions, and color mixing, you can create stunning portraits that capture the essence of your subject. Don’t be afraid to experiment with different techniques and materials to find what works best for you.
Remember, every painting is a learning experience. Embrace the process, and don’t be discouraged by mistakes—they’re an essential part of growth as an artist.
Happy painting!
If you enjoyed this guide, don’t forget to like, share, and subscribe for more art tutorials and tips!