Painting a portrait is both an art and a science. It requires a balance of technical skill, observation, and creativity. In this blog post, I’ll walk you through my process of painting a portrait, from the initial sketch to the final touches. Whether you’re a beginner or an experienced artist, these steps will help you create a portrait that captures both the likeness and the essence of your subject.
Step 1: Start with a Sketch
Every great portrait begins with a solid sketch. I always start by placing the face on the canvas and marking the centerline. This helps me maintain symmetry and proportion. I then measure the distances between key facial features, such as the eyebrows, nose, and chin. These measurements serve as a guide, even though faces aren’t perfectly symmetrical.
To simplify the process, I squint my eyes to focus on the major shapes and shadows. This technique helps me block in the basic structure without getting overwhelmed by details. For example, I’ll sketch the eye sockets, the nasal bone, and the jawline, using simple shapes like circles and rectangles to map out the face.
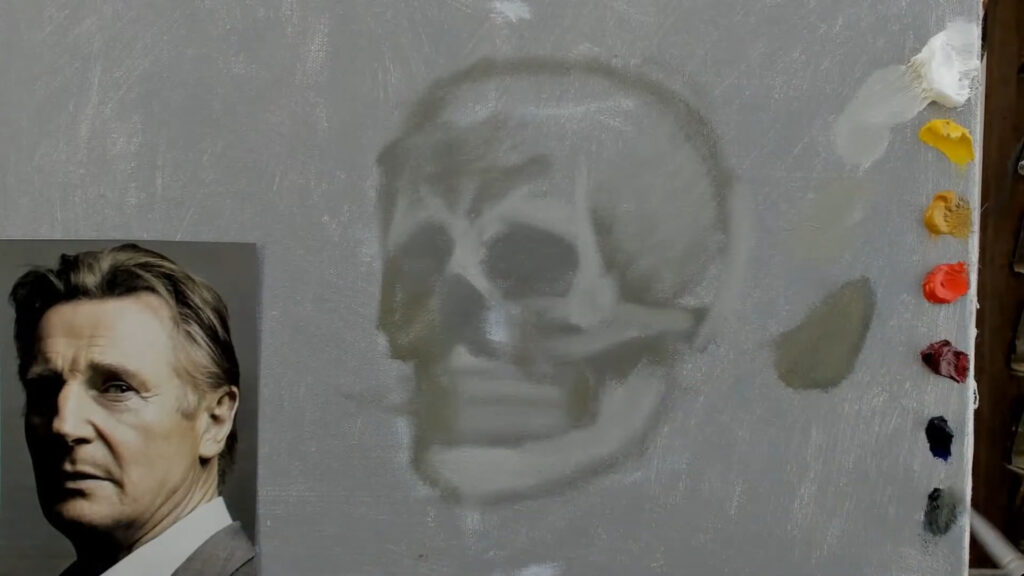
Step 2: Understand the Anatomy
Understanding the underlying anatomy of the face is crucial. I think of the skull as the foundation of the portrait. By visualizing the zygomatic bone (cheekbone), the maxilla (upper jaw), and the mandible (lower jaw), I can better understand how light and shadow fall on the face.
For instance, I know that the highlight on the cheekbone is there because of the underlying bone structure. This knowledge helps me place highlights and shadows accurately, even if I’m working from a reference photo. It’s like having an internal compass that guides me through the painting process.
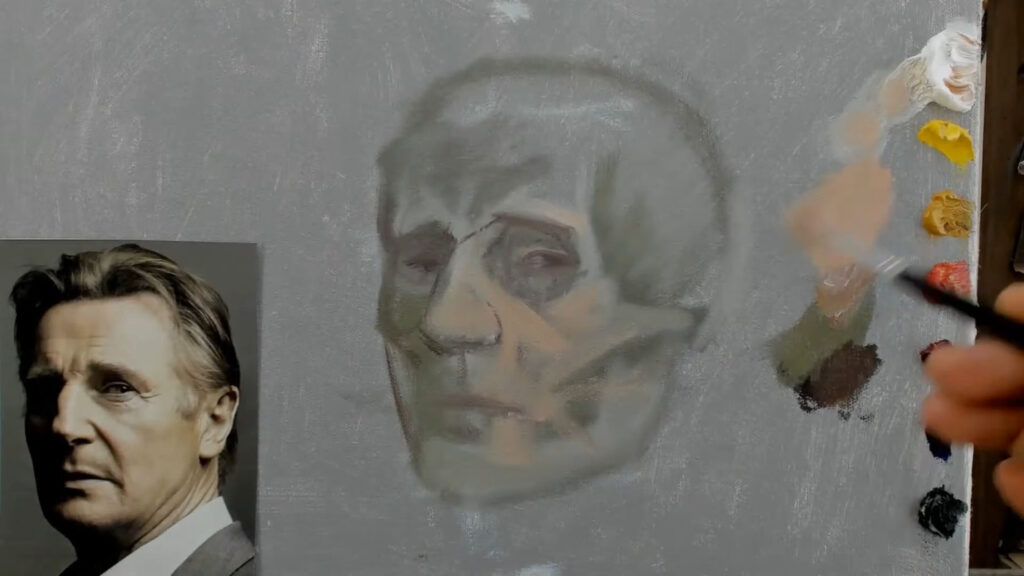
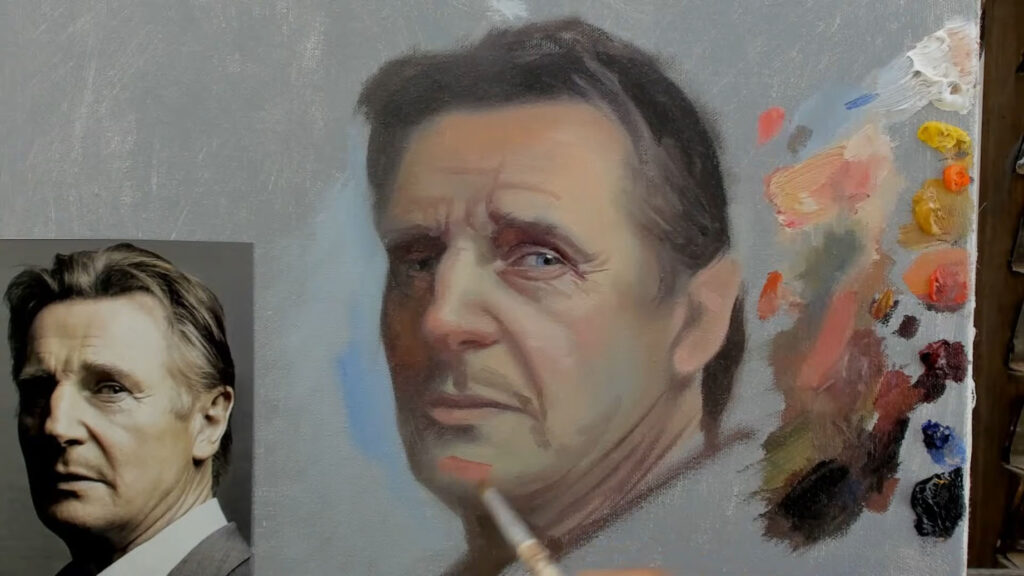
Step 3: Build Layers with Color
Once the sketch is complete, I start adding color. I begin with a muted base, often mixing Titanium White and Raw Umber to create a grayish tone. This neutral base allows me to build up colors gradually. I then add warmer tones, like reds and oranges, to the cheeks, nose, and ears, and cooler tones, like greens and blues, to the shadows.
I use thin layers of paint at first, gradually building up the thickness. This approach gives me more control over the final result. For example, I’ll mix Cadmium Red and a touch of black to create a warm, reddish tone for the lips, and then blend it softly into the surrounding skin tones.
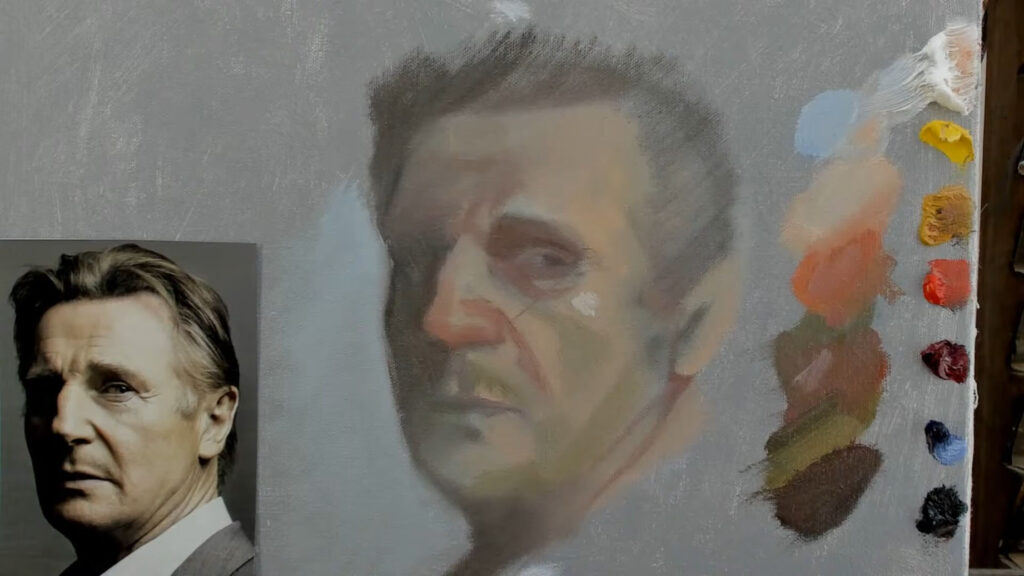
Step 4: Focus on Light and Shadow
Light and shadow are what give a portrait depth and dimension. I always start by identifying the light source in my reference photo. This helps me determine where the highlights and shadows should fall.
For example, if the light is coming from the top left, I’ll add highlights to the left side of the forehead, cheekbone, and nose. I’ll also deepen the shadows on the right side of the face, under the chin, and around the eyes. By carefully controlling the values (the lightness or darkness of the colors), I can create a sense of volume and realism.
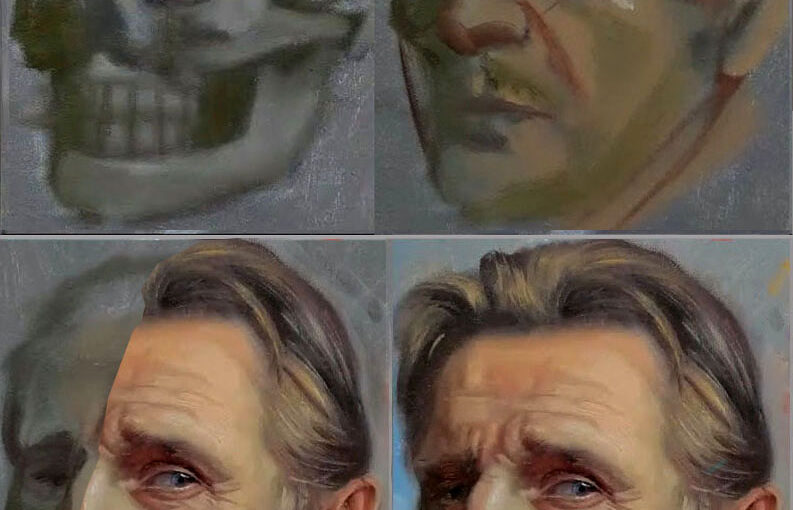
Step 5: Refine the Details
As the painting progresses, I focus on refining the details. I soften some edges to create a more natural look, while keeping others sharp to define the contours of the face. For example, I’ll soften the edges around the cheeks and forehead but keep the nose and jawline more defined.
I also pay attention to subtle color variations. For instance, I’ll add a touch of green to the shadows under the eyes and reddish tones to the ears and chin. These small details bring the portrait to life and add a sense of realism.
Step 6: Add Texture and Depth
Texture is an essential element in my portraits. I use thick brushstrokes to add dimension to the face, especially in areas like the beard or the contours of the cheeks. This technique not only enhances the visual appeal but also adds a tactile quality to the painting.
For example, I’ll use a dry brush to create the texture of stubble on the chin or the fine lines around the eyes. These details make the portrait feel more lifelike and engaging.
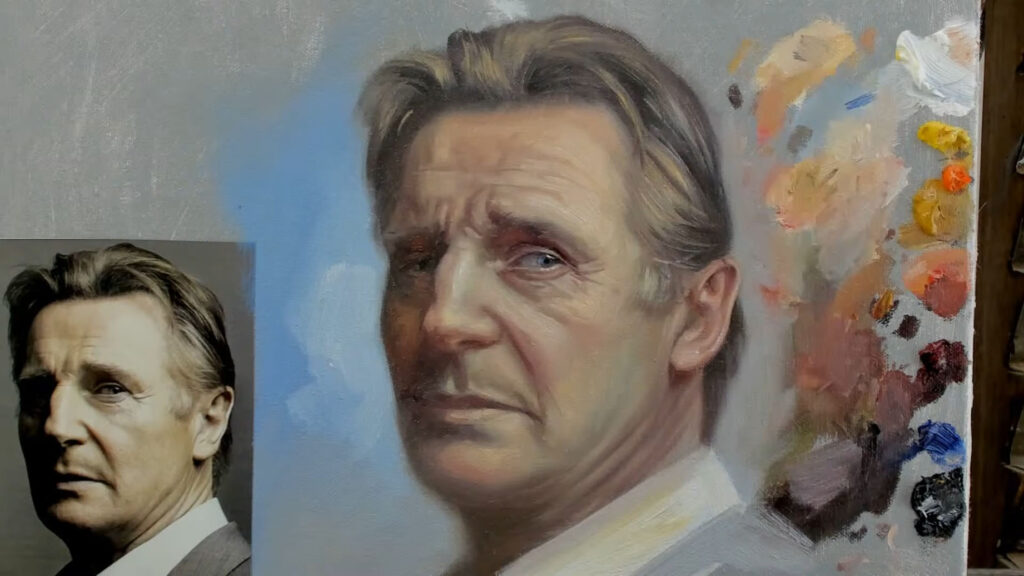
Step 7: Final Touches
In the final stages, I step back and assess the painting as a whole. I look for areas that need more contrast, texture, or refinement. For example, I might add more highlights to the forehead or deepen the shadows under the chin to create more depth.
I also pay attention to the background. A well-chosen background can enhance the portrait without overpowering it. For this painting, I chose a neutral gray background, which allows the face to stand out while adding a sense of balance to the composition.
Tips for Success
- Practice Observation: Spend time studying your subject and understanding the relationships between light, shadow, and color.
- Start Thin: Begin with thin layers of paint and gradually build up the thickness. This approach gives you more control over the final result.
- Understand Anatomy: Knowing the underlying structure of the face will help you place highlights and shadows accurately.
- Experiment with Texture: Don’t be afraid to use thick brushstrokes to add dimension and interest to your painting.
- Know When to Stop: It’s easy to overwork a painting. Step back regularly and assess your progress to avoid going too far with details.
Conclusion
Painting a portrait is a journey of observation, creativity, and patience. By following these steps and trusting your instincts, you can create a portrait that captures both the likeness and the essence of your subject. Remember, there are no strict rules in art—only possibilities. So, grab your brushes, set up your palette, and let your creativity flow.
Happy painting!
— Renso
Hello! I hope you’re having a great day. Good luck 🙂