Painting a portrait is a deeply rewarding artistic endeavor, but using a palette knife instead of a brush can take your work to a whole new level. Palette knife painting is known for its bold, textured, and expressive qualities, making it a unique way to capture the essence of a subject. In this blog post, I’ll walk you through the process of creating a stunning portrait with a palette knife, step by step. If you’re more of a visual learner, don’t forget to check out the accompanying video where I demonstrate each step in real time!
Why Use a Palette Knife for Portraits?
Using a palette knife for portraits is all about embracing texture, movement, and spontaneity. Unlike brushes, palette knives create thick, impasto strokes that add dimension and energy to your work. This technique encourages you to focus on shapes, colors, and textures rather than fine details, resulting in a more impressionistic or abstract style. It’s perfect for artists who want to break free from traditional methods and explore a more dynamic approach.
Materials You’ll Need
Here’s what I used in the video:
- Palette Knives: A variety of sizes and shapes (trowel, diamond, or angled knives work well).
- Canvas: Stretched canvas or canvas board.
- Acrylic or Oil Paints: I used oils for their blendability, but acrylics work great too.
- Palette: For mixing colors.
- Reference Photo: A clear image of your subject.
- Easel: To keep your canvas upright.
- Paper Towels or Rags: For cleaning your knife between colors.
Step 1: Prepare Your Reference and Canvas
In the video, I start by selecting a high-quality reference photo with good lighting and clear features. I then sketch the basic outline of the portrait onto the canvas using a pencil. Keep the sketch loose—this is just a guide to help you place the major features like the eyes, nose, mouth, and hairline.
Step 2: Mix Your Colors
Palette knife painting relies heavily on color mixing. In the video, I show you how to create a range of skin tones, shadows, and highlights on your palette. Don’t aim for perfection—slight variations in color will add depth and realism to your portrait. Remember, you can always layer and adjust as you go.

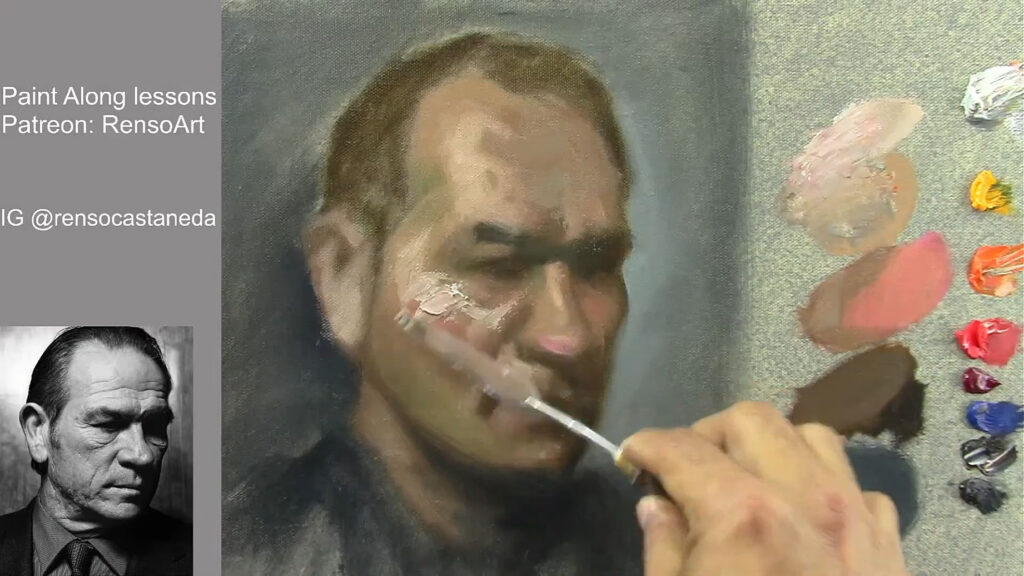
Step 3: Build the Base Layers
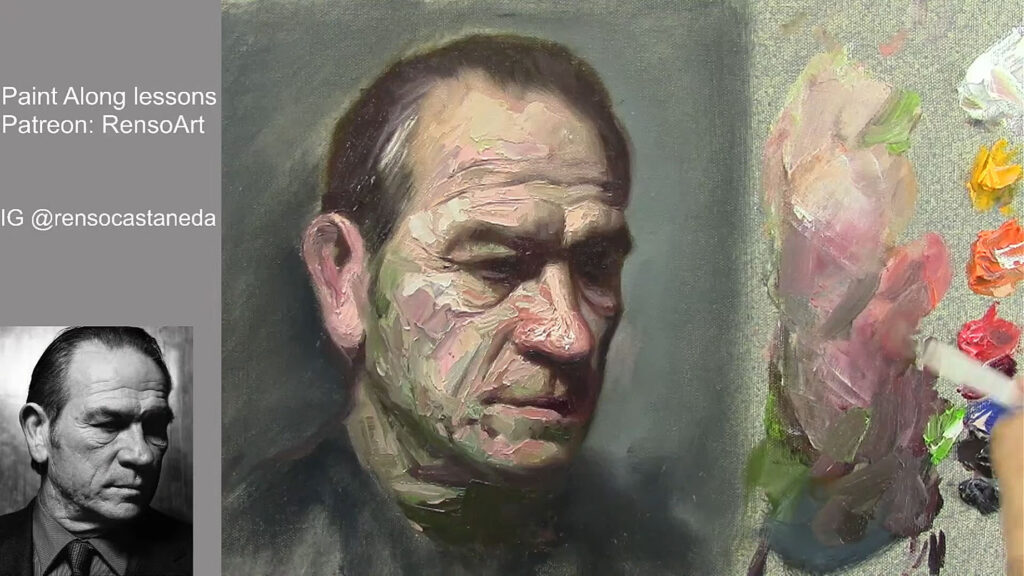
Using a medium-sized brush, I start blocking in the larger shapes of the face. Focus on the mid-tone colors first, applying the paint kind of thin. at this stage I need more control to get the likeness, gradually adding shadows and highlights. It is just the beginning , avoid getting caught up in details—think about the face in terms of planes and shapes.
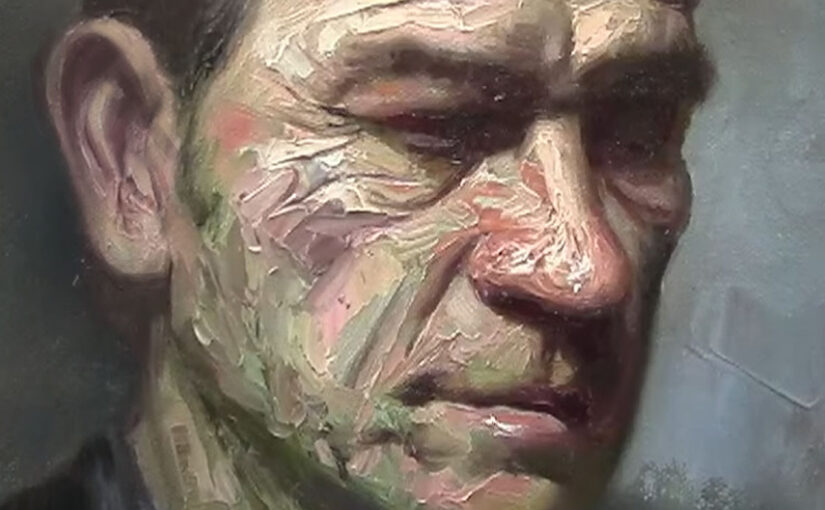
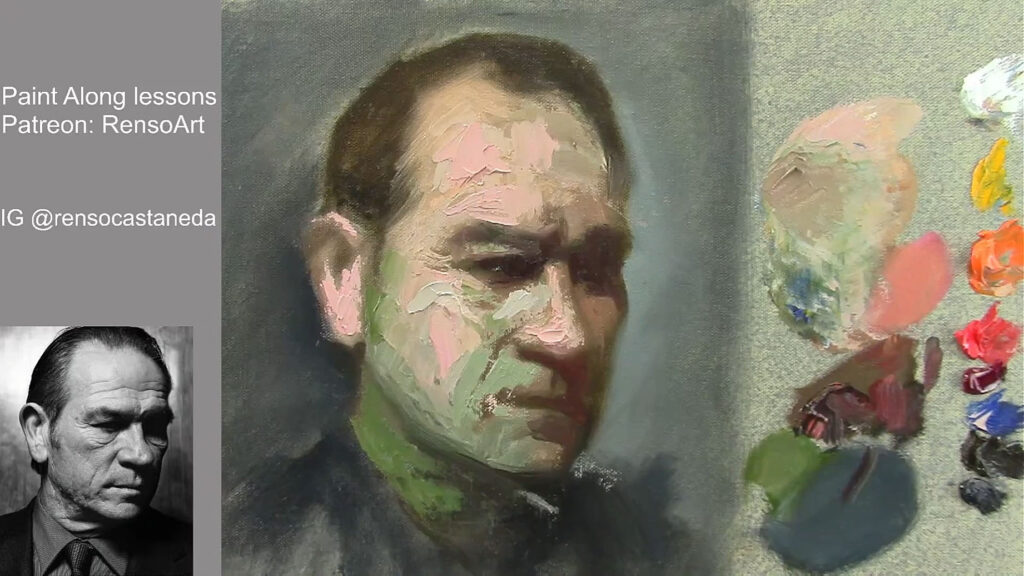
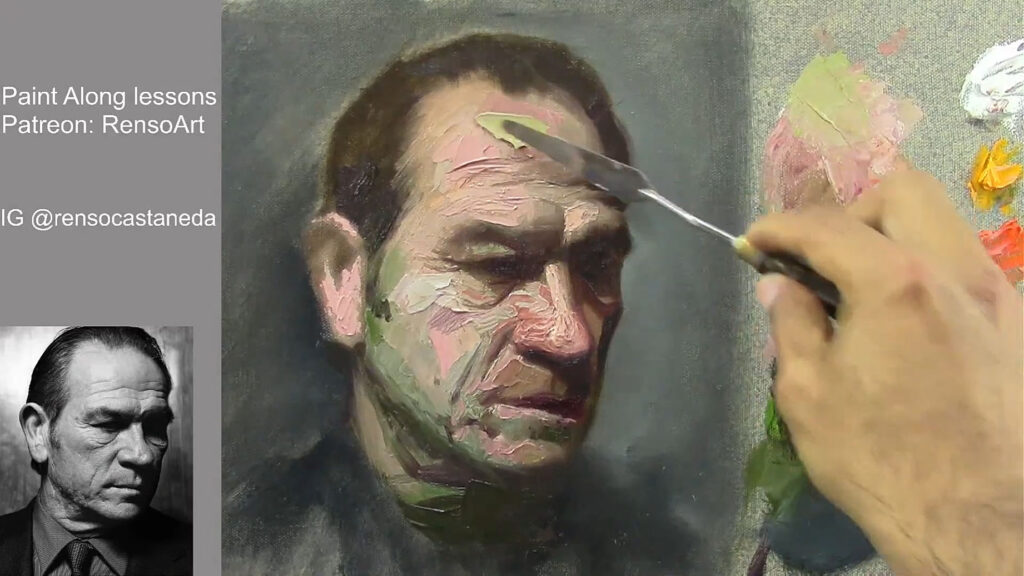
Step 4: Add Texture and Dimension
This is where the palette knife truly shines. In the video, I demonstrate how to use the edge of the knife to carve out sharp lines for features like the nose, lips, and jawline. For softer areas like cheeks and forehead, I use the flat side of the knife to blend and layer colors. Experiment with different angles and pressures to create varied textures.
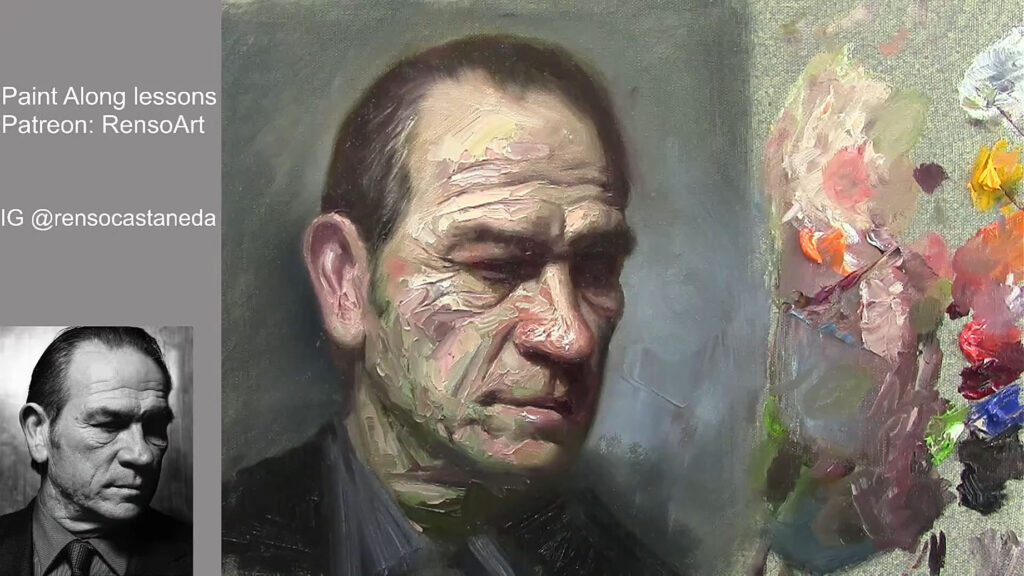
Step 5: Refine the Features
Once the base layers are in place, I start refining the facial features. Using a smaller brush, I add details like the eyes, eyebrows, and lips. Remember, you don’t need to paint every detail—suggesting features with bold strokes can be just as effective.
Step 6: Work on the Hair and Clothing
Hair is a great opportunity to play with texture. In the video, I show you how to use quick, directional strokes to mimic the flow of hair. Don’t be afraid to leave some areas rough and unfinished—it adds to the expressive quality of the piece. For clothing, I focus on capturing the folds and shadows with broad, expressive strokes.
Step 7: Step Back and Evaluate
At the end of the video, I take a step back from the painting to assess the overall composition. I look for areas that need more contrast, texture, or color and make any final adjustments. Remember, palette knife paintings often look best when they retain a sense of spontaneity, so try not to overwork the piece.
Tips for Success
- Embrace Imperfection: Palette knife painting is all about bold, expressive strokes. Don’t stress over small mistakes—they add character to your work.
- Layer Wisely: Allow layers to dry slightly before adding new ones, especially if you’re using oils. This prevents colors from muddying.
- Experiment with Pressure: Light pressure creates thin, delicate strokes, while heavy pressure produces thick, textured marks.
- Practice Patience: Palette knife painting can be challenging at first, but with practice, you’ll develop a feel for the tool and its possibilities.
Watch the Video!
If you’re curious to see how I bring this portrait to life with a palette knife, be sure to watch the accompanying video. I walk you through each step in real time, sharing tips and techniques along the way. Whether you’re a beginner or an experienced artist, this video will inspire you to pick up a palette knife and start creating!
Conclusion
Painting a portrait with a palette knife is a thrilling way to explore texture, color, and form. It encourages you to think differently about your subject and embrace a more tactile, expressive approach. Whether you’re following along with this blog post or watching the video, I hope you feel inspired to try this technique for yourself.
Have you tried painting with a palette knife? Share your experiences and tips in the comments below—I’d love to hear from you! And don’t forget to like, share, and subscribe for more art tutorials and inspiration. Happy painting! 🎨