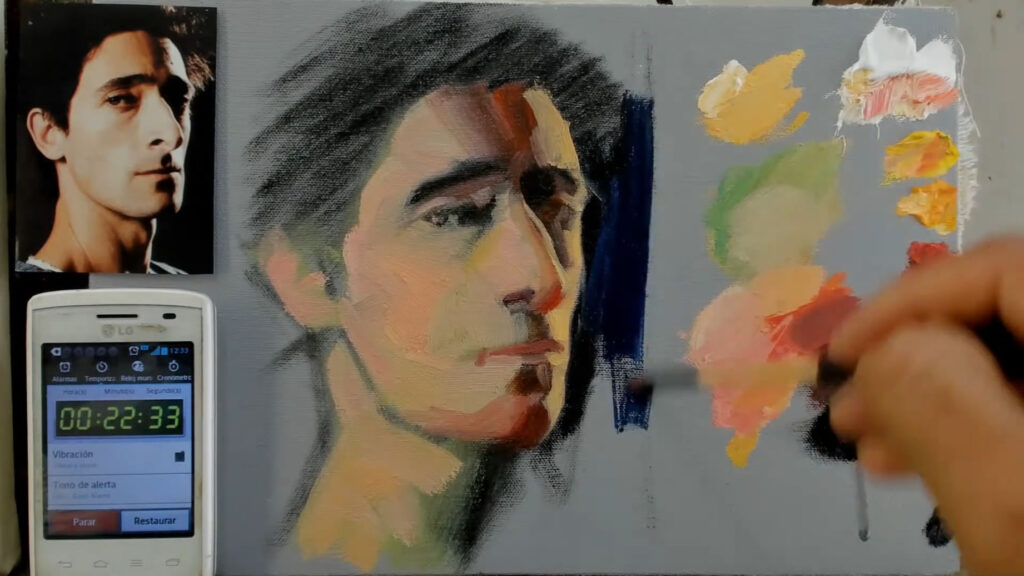
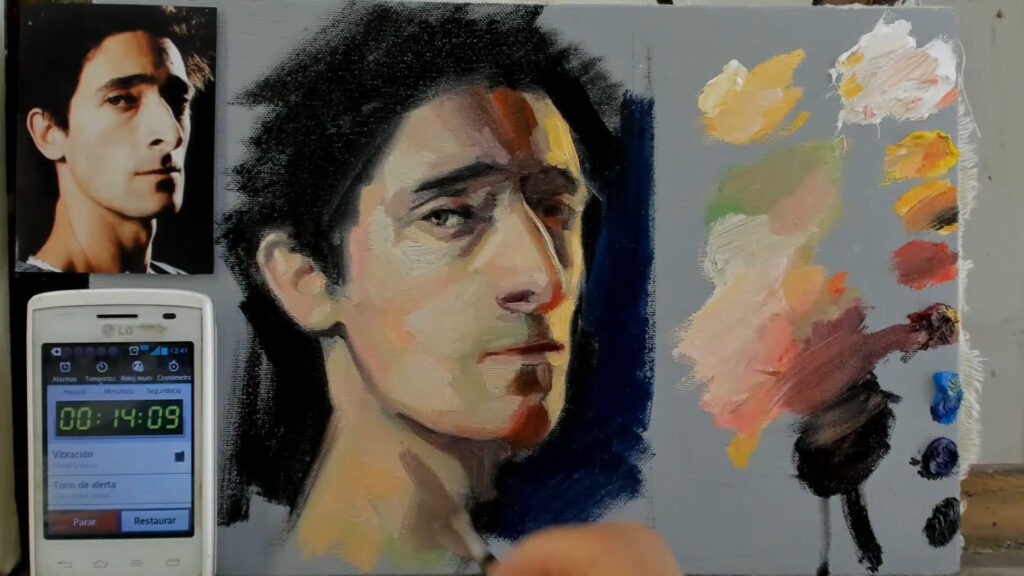
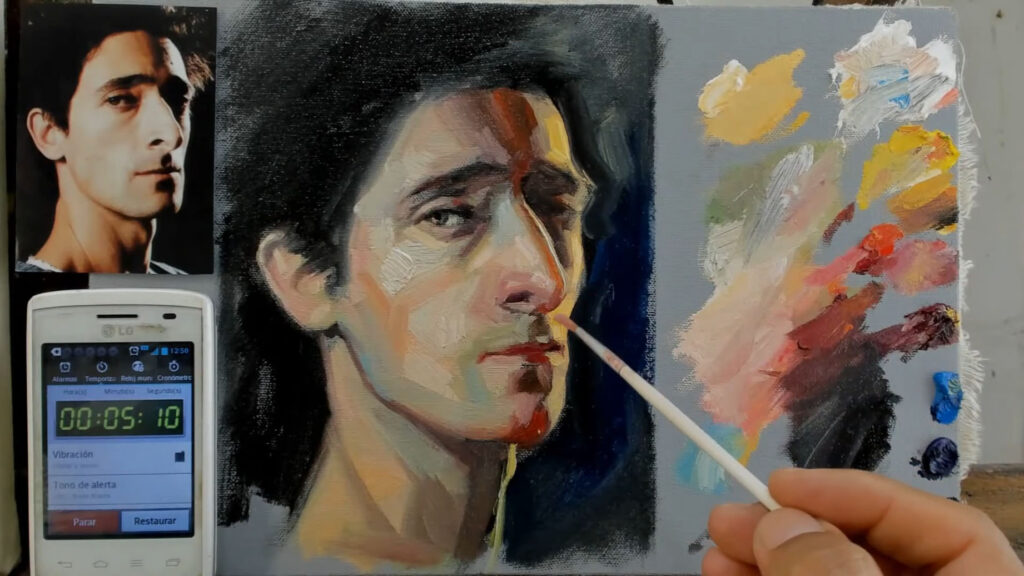
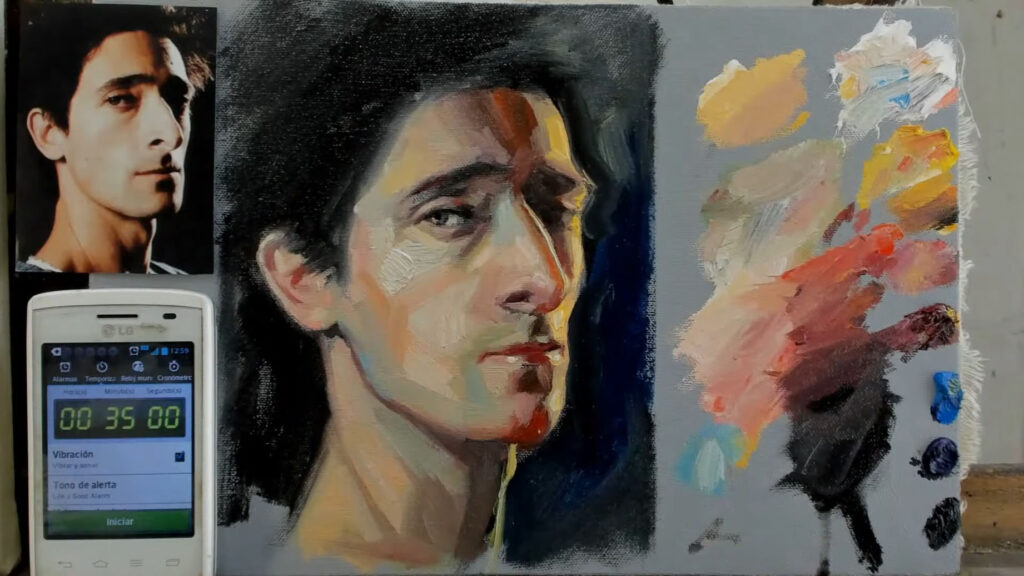
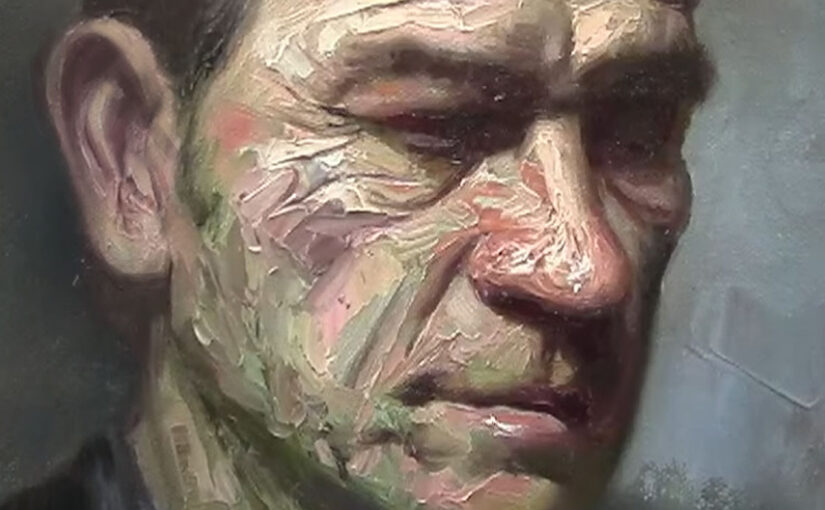
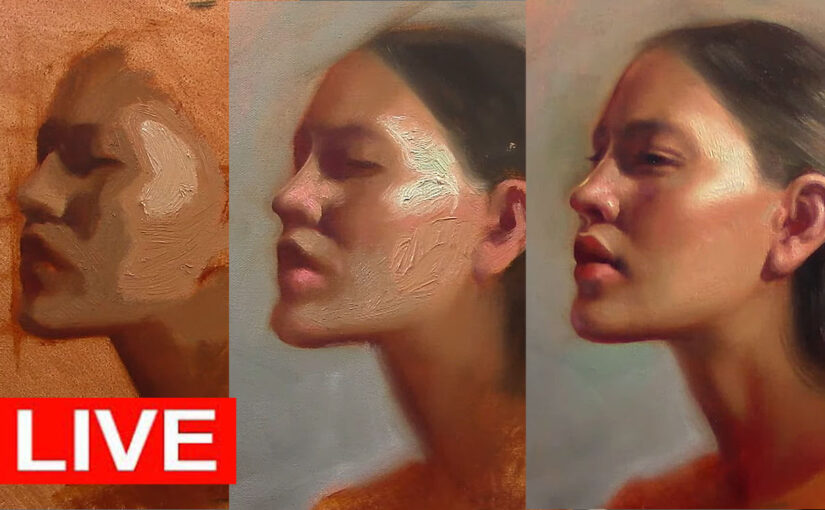
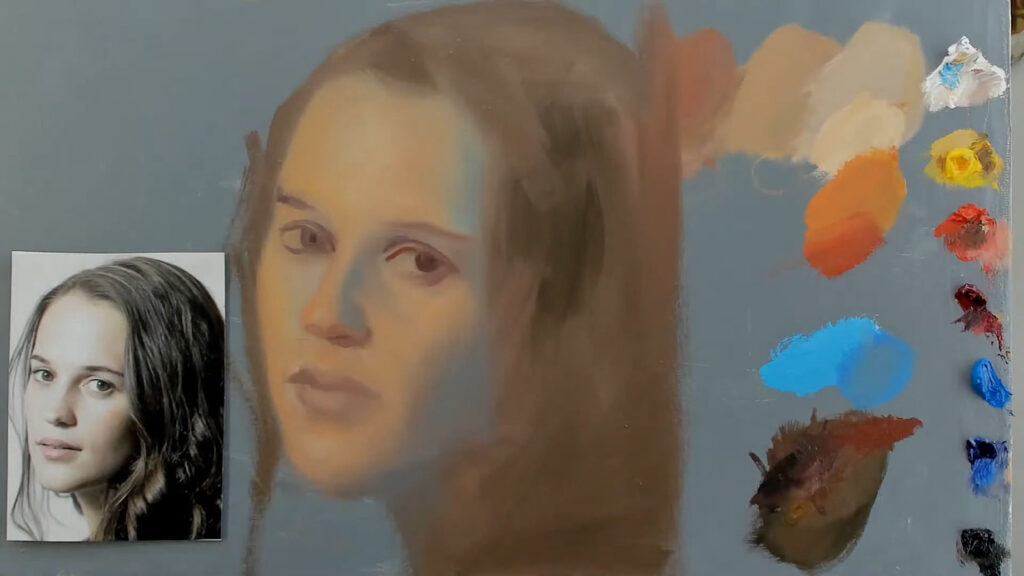
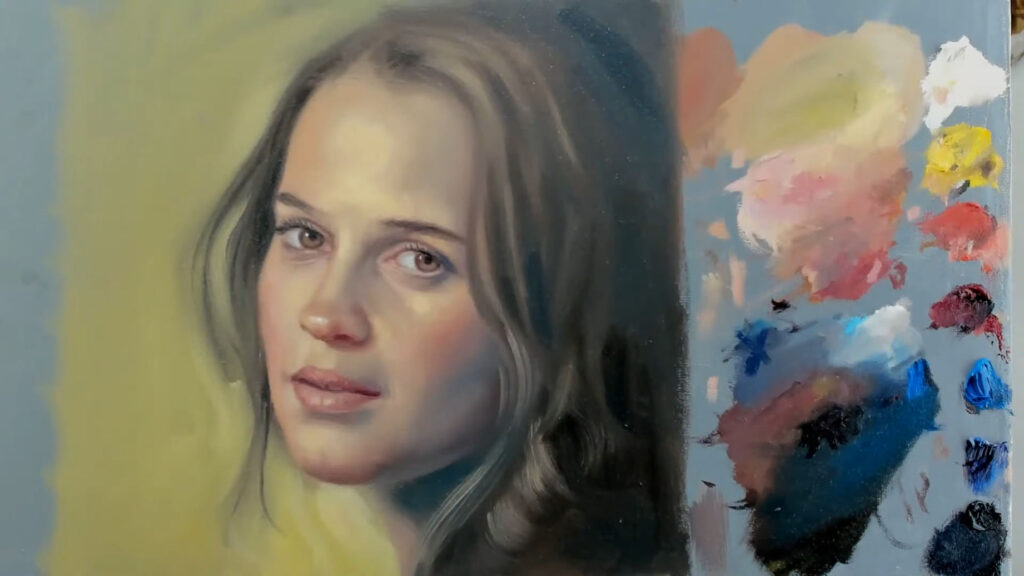
The Planes of the Face: A Deep Dive into Portrait Painting

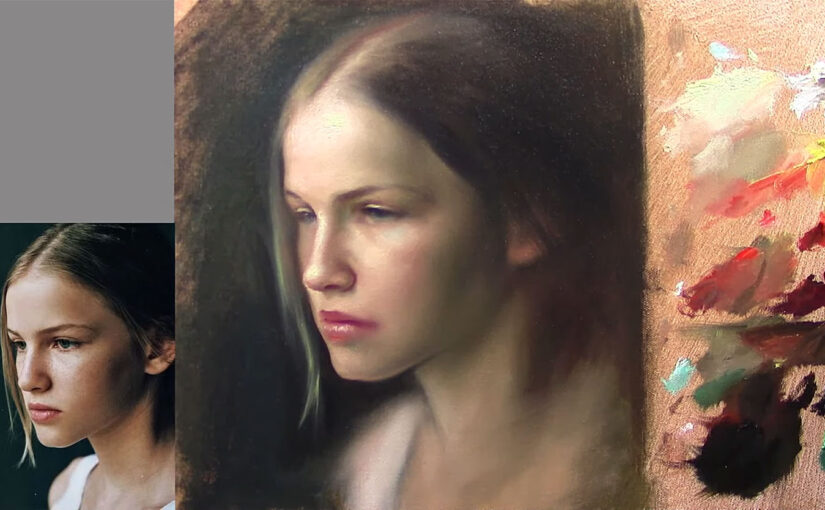
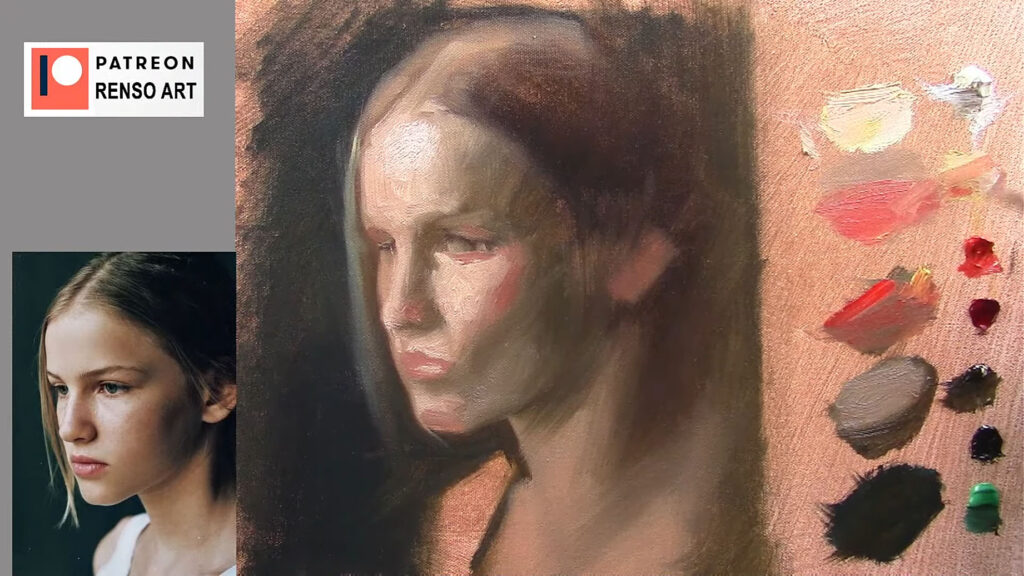
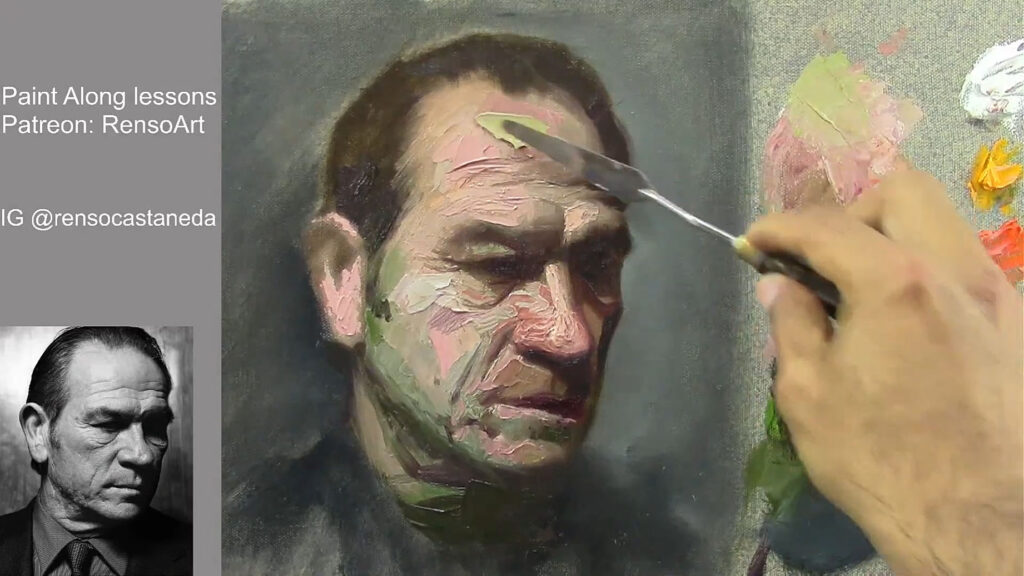
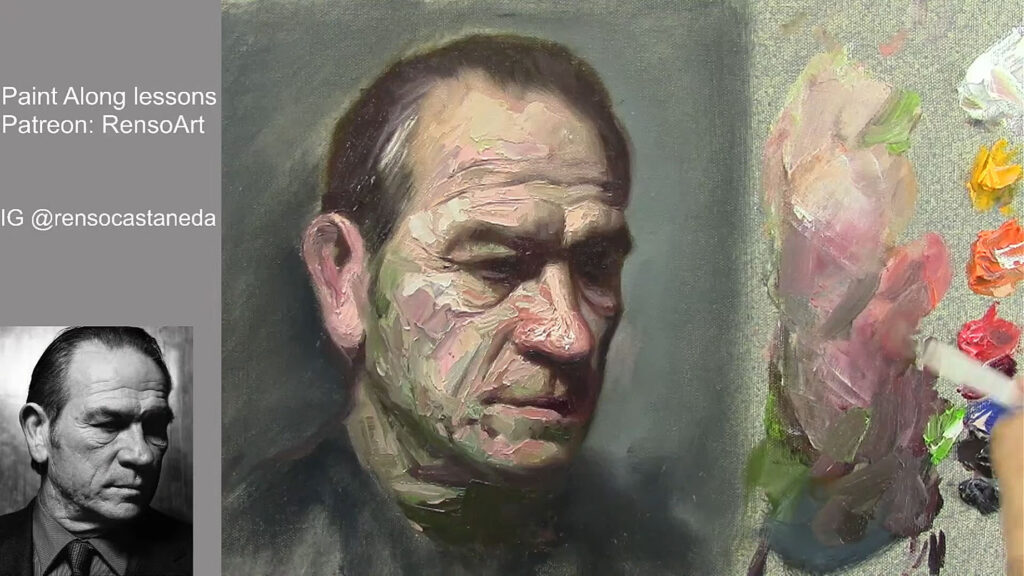
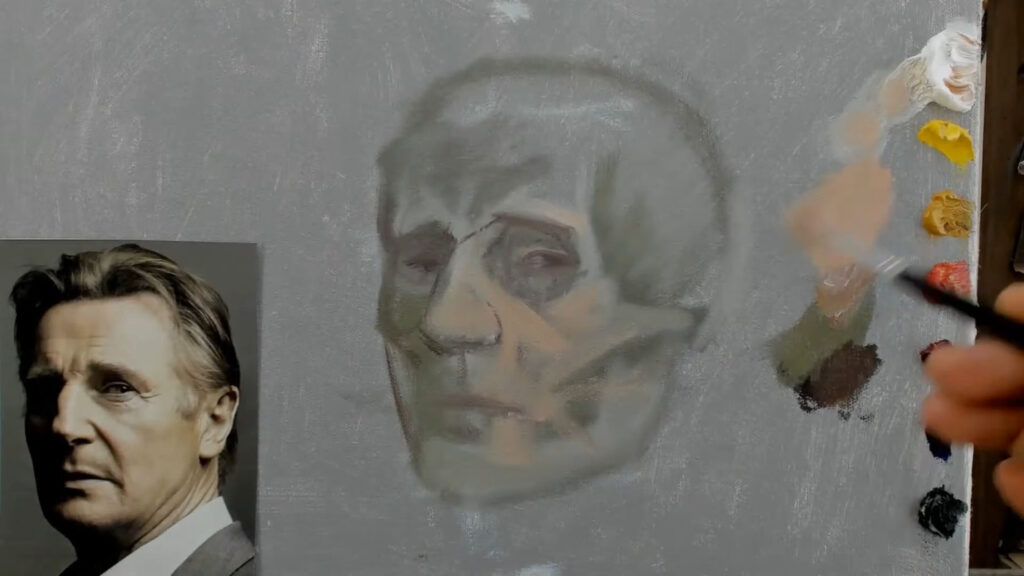
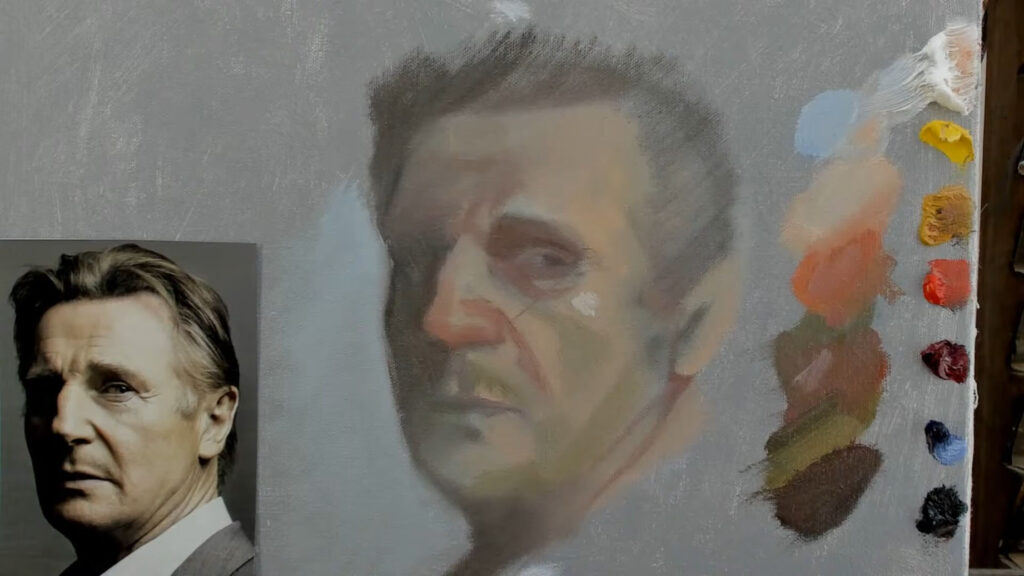
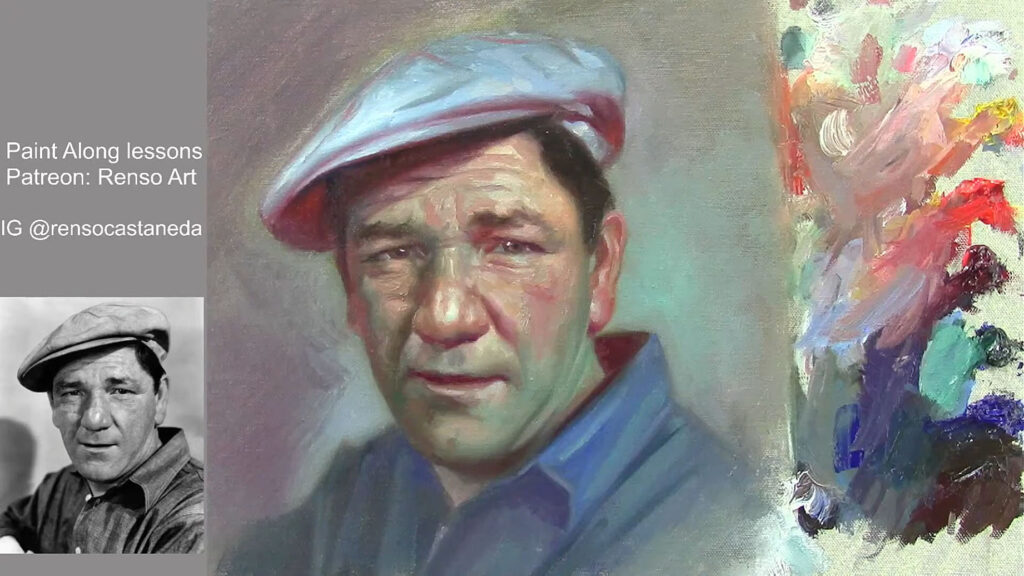
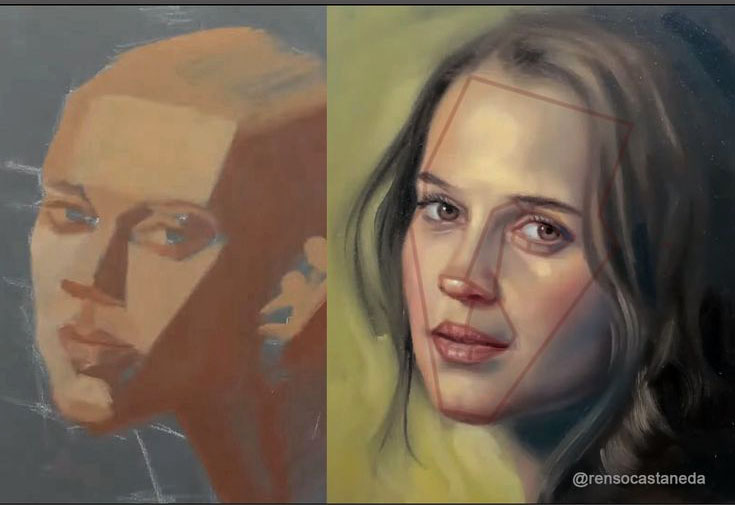
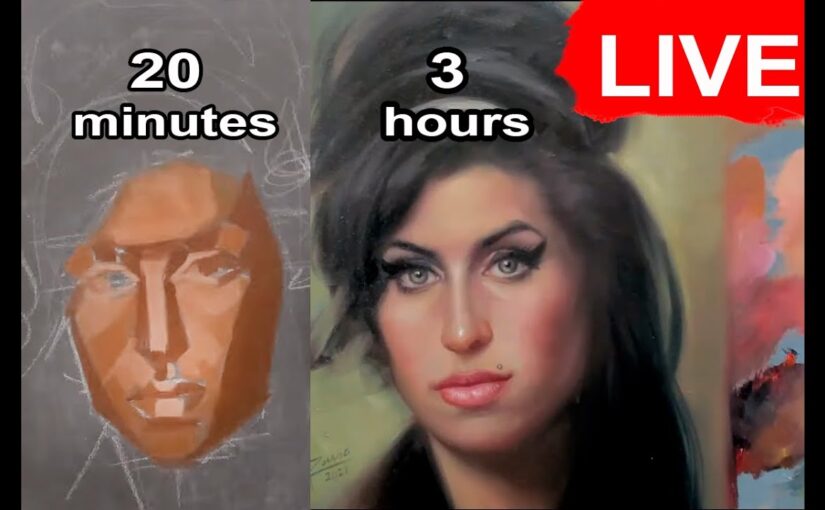
Alright, let’s get into it. Painting a portrait is like building a house—you need a solid foundation, and in this case, that foundation is the planes of the face. These planes are the flat and curved surfaces that make up the structure of a face. Think of them as the puzzle pieces that, when put together, create a realistic, three-dimensional likeness. But here’s the thing: it’s not just about drawing the eyes, nose, and mouth in the right place. It’s about understanding how light and shadow interact with those planes to give the face its form and depth. So, let’s break it down, step by step, and keep it casual while we’re at it.


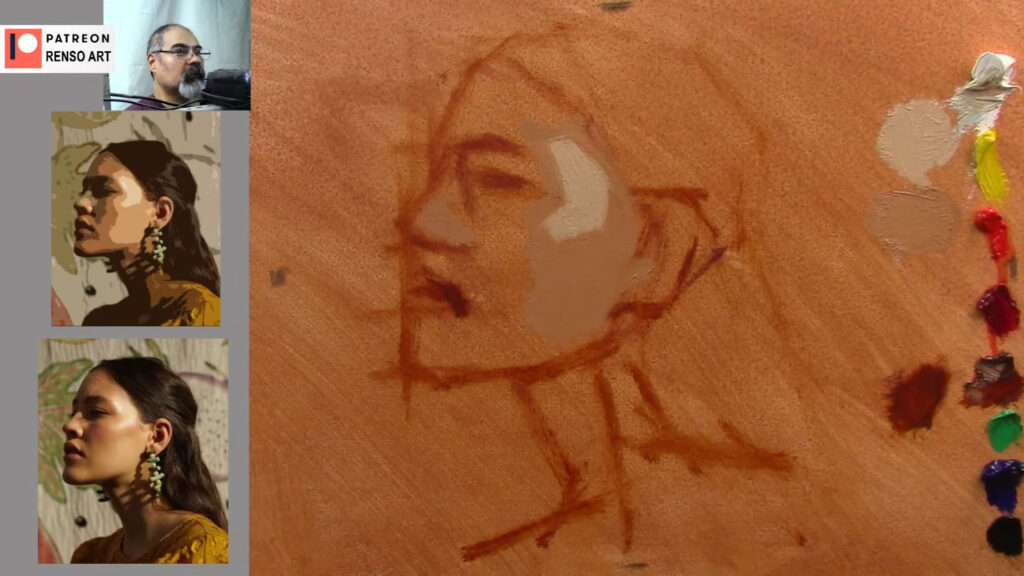
Starting with the Basics: The Center Line

Every portrait starts with the center line. This is the imaginary line that runs vertically down the middle of the face, dividing it into two symmetrical halves. But here’s the kicker: faces aren’t perfectly symmetrical. One eye might be slightly higher, the nose might tilt a little, or the mouth might curve more on one side. So, while the center line is your guide, you’ve got to be flexible with it.

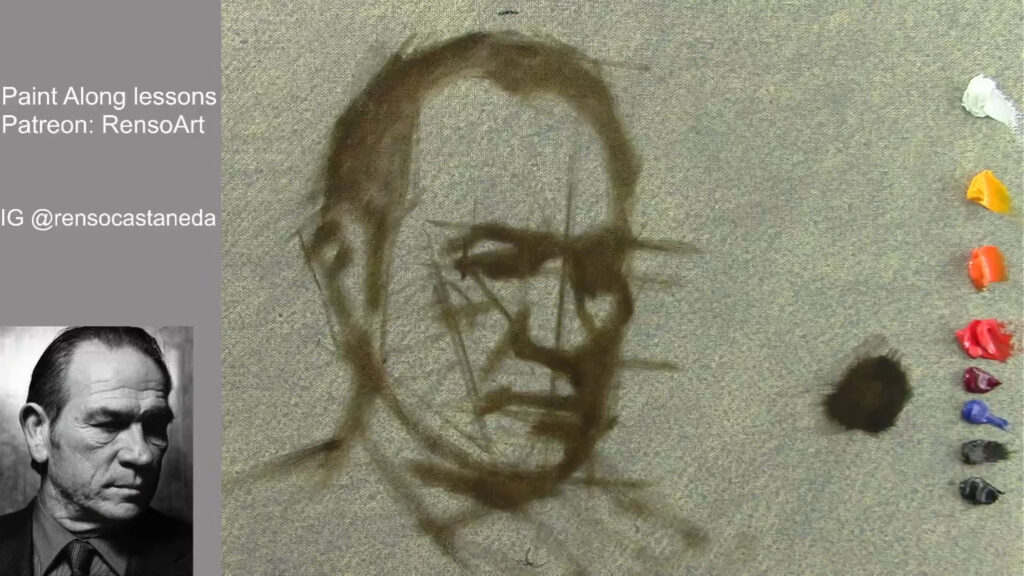
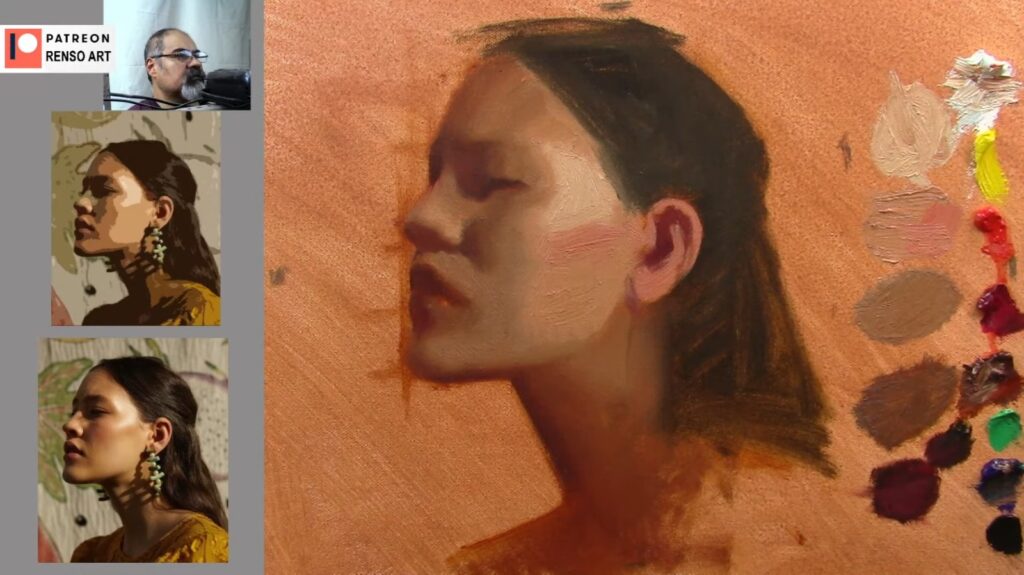
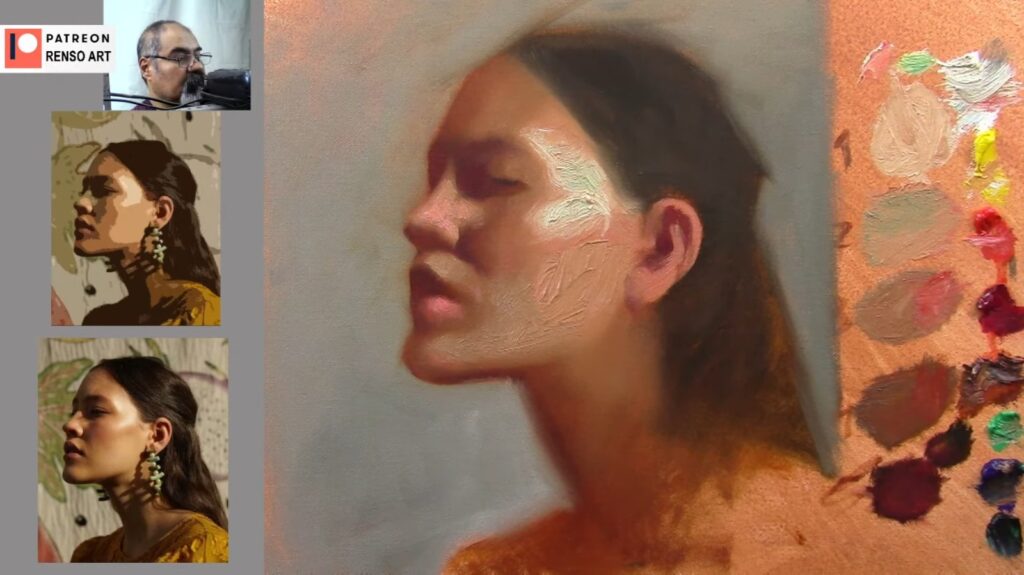
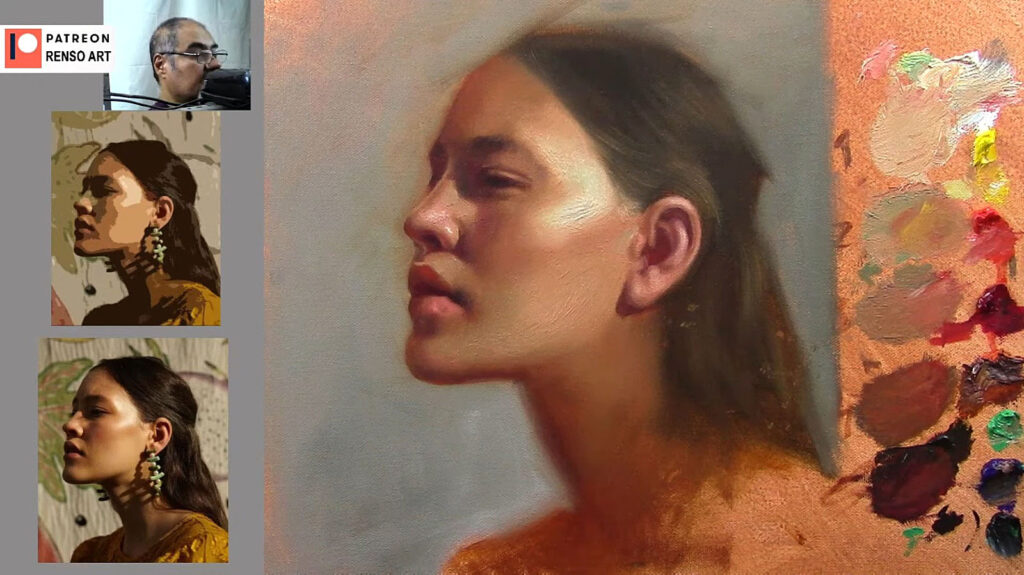
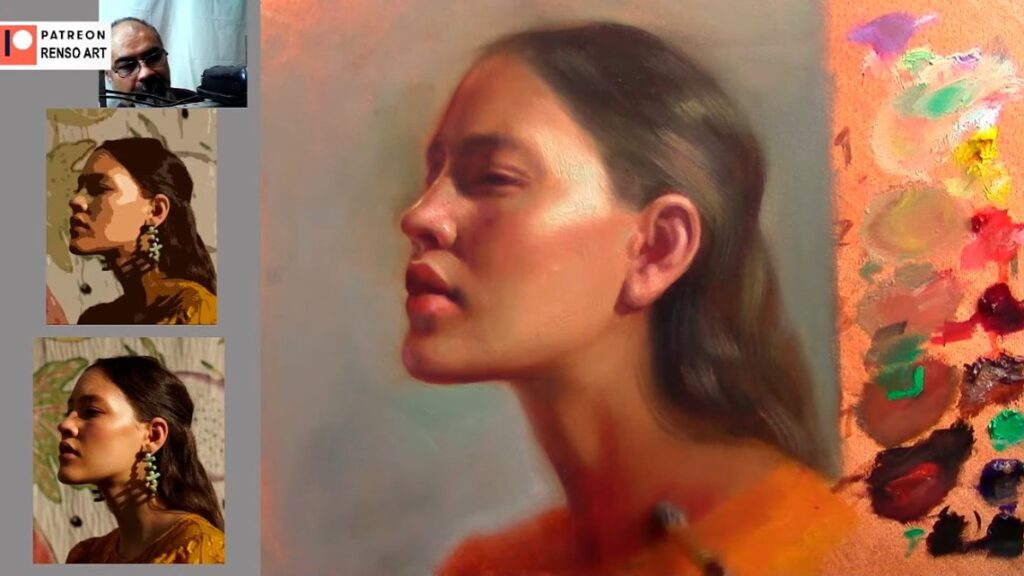
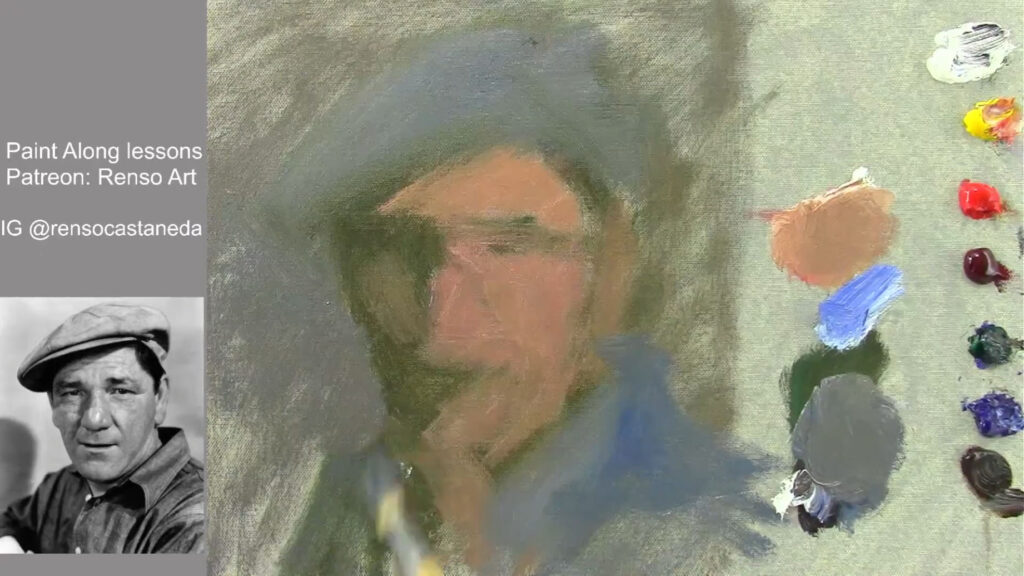
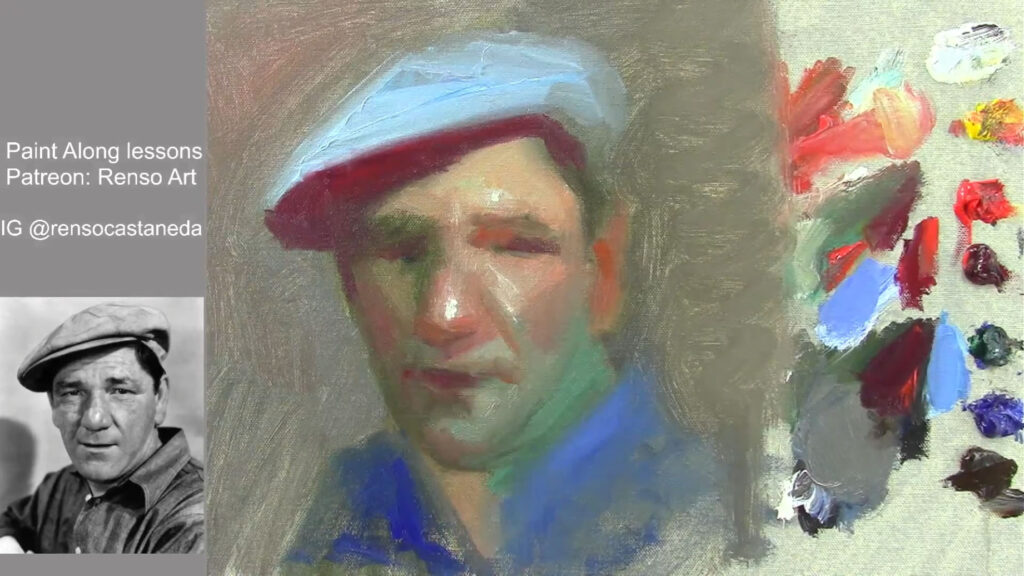
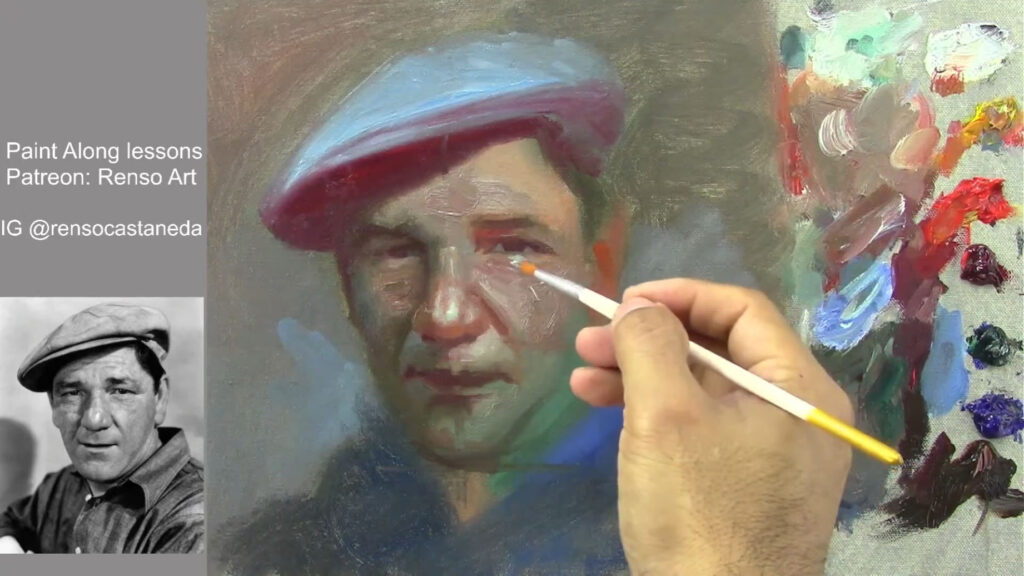
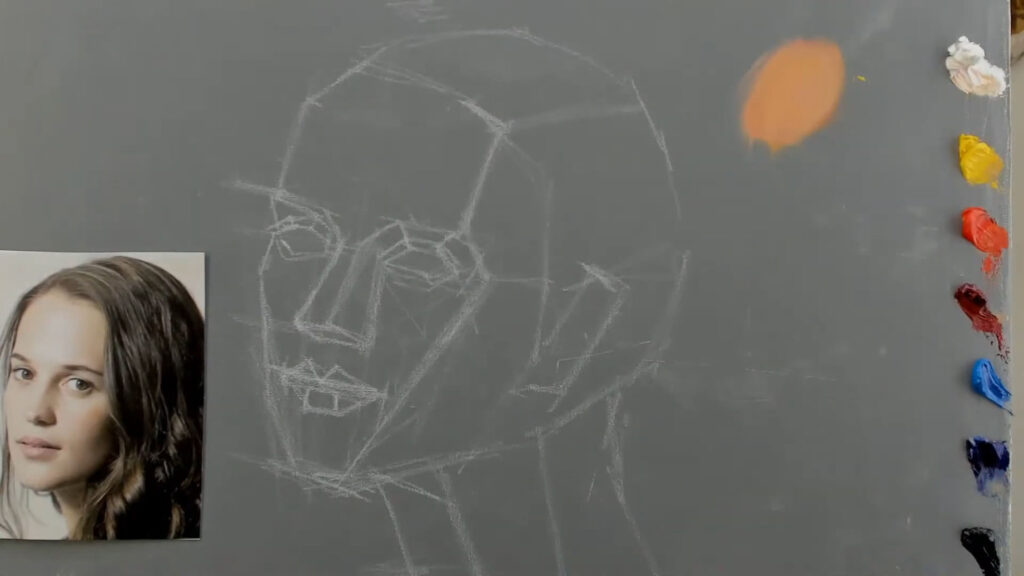
As I was working on this portrait, I kept checking the center line, the eye line, the nose line, and the mouth line. It’s like a constant dance—you’re always measuring, adjusting, and re-measuring. And don’t even get me started on the triangle formed by the eyes and the nose. That triangle is your best friend when it comes to getting the proportions right. If the triangle is off, the whole face feels wrong.


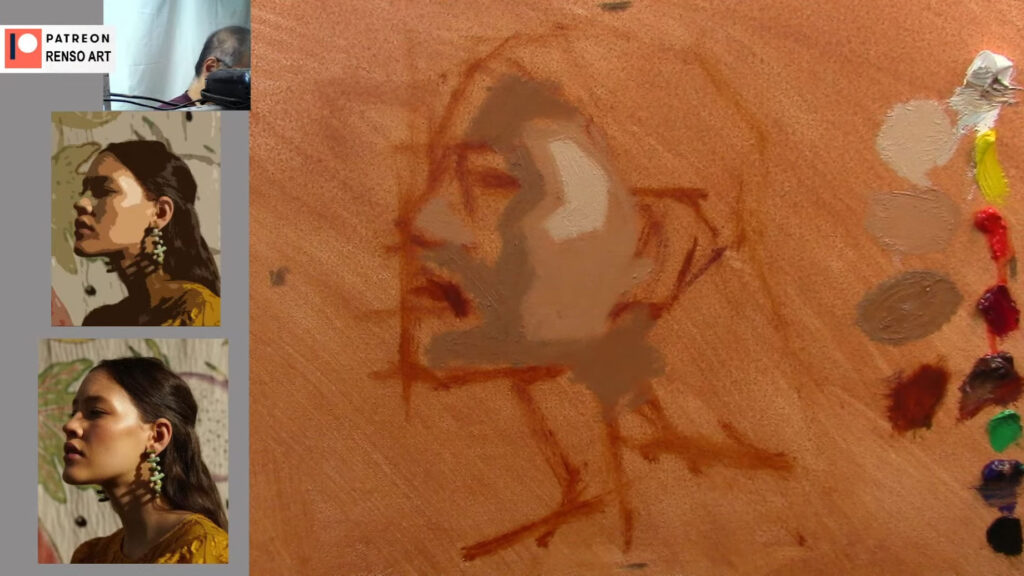
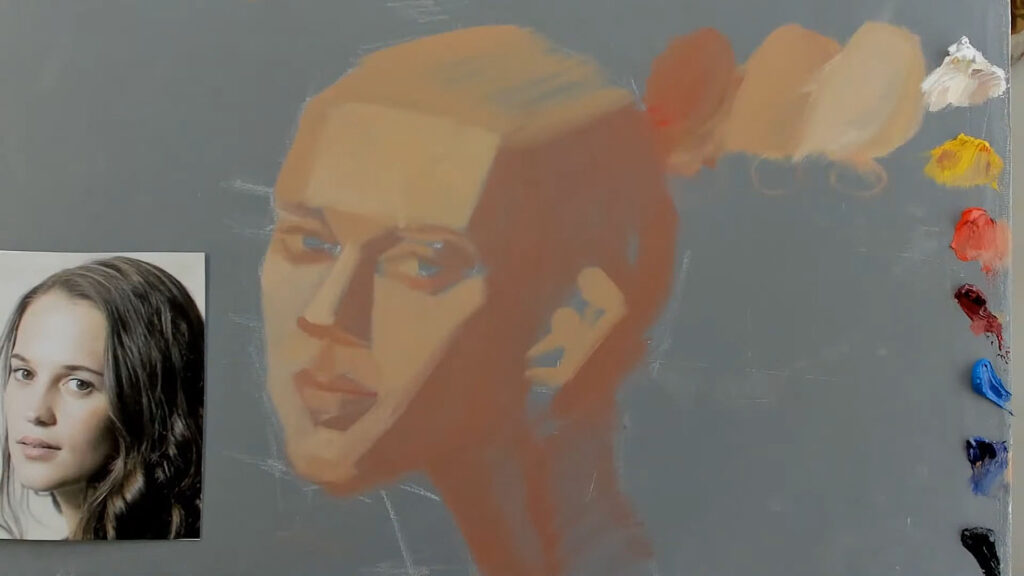
Studying the planes of the face is essential for understanding structure, form, and light in portrait painting. Breaking the face into simplified geometric planes helps in achieving depth and realism. Here’s a breakdown of the key planes:

1. Major Planes

These are the broadest divisions of the head, which establish the overall structure:

  • Front Plane – The face’s flat front surface.
  • Side Planes – The areas that wrap around from the temples to the cheeks.
  • Top Plane – The forehead and upper skull.
  • Bottom Plane – The underside of the chin and jawline.
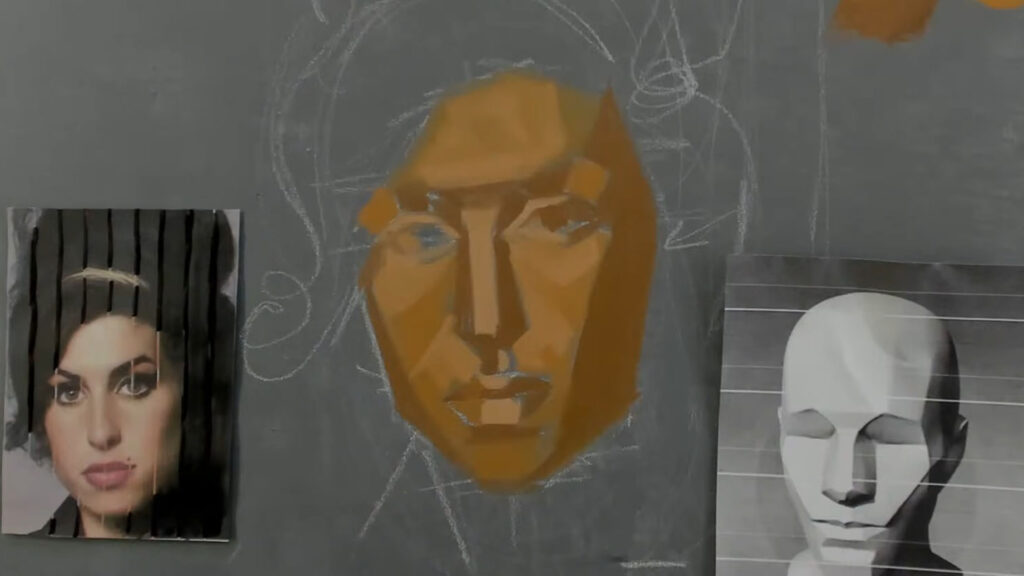
2. Primary Facial Planes

These define the major shapes within the face:

  • Forehead Plane – Often divided into the upper, middle, and lower sections.
  • Cheek Planes – The prominent areas that catch light, shifting toward shadow at the edges.
  • Eye Sockets – Recessed areas that define the brow ridge and contribute to facial depth.
  • Nose Planes – The bridge, sides, and bottom of the nose have distinct planes.
  • Mouth Area Planes – The upper lip angles inward, while the lower lip has fuller, rounded planes.
  • Chin and Jaw Planes – These define the transition between the face and neck.

3. Light & Shadow Considerations

Understanding planes helps control how light interacts with the face:

  • Flat planes catch more light (like the forehead and cheekbones).
  • Angled planes create shadows (such as the sides of the nose and under the jaw).
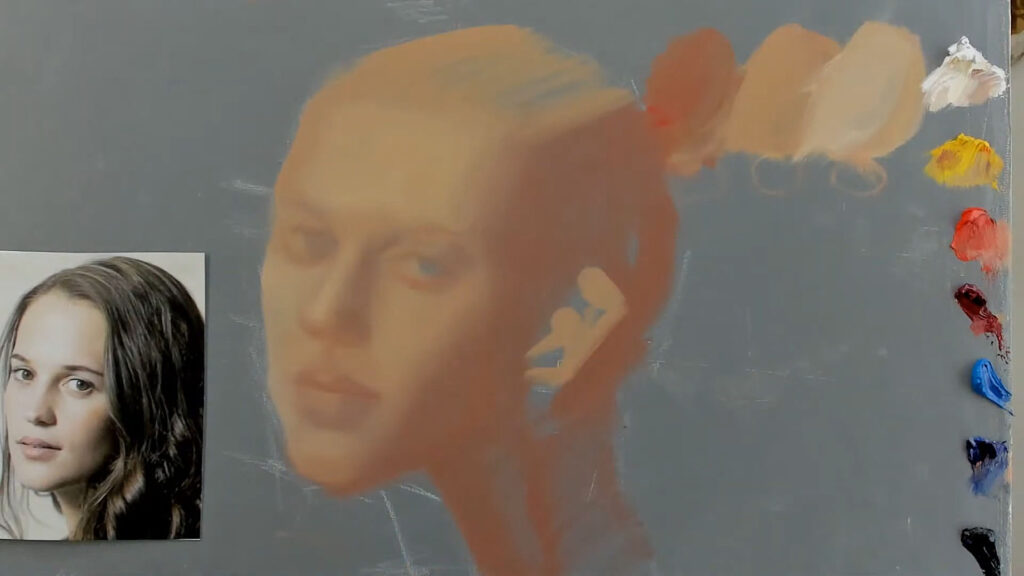
  • Subtle transitions between planes give a realistic form.
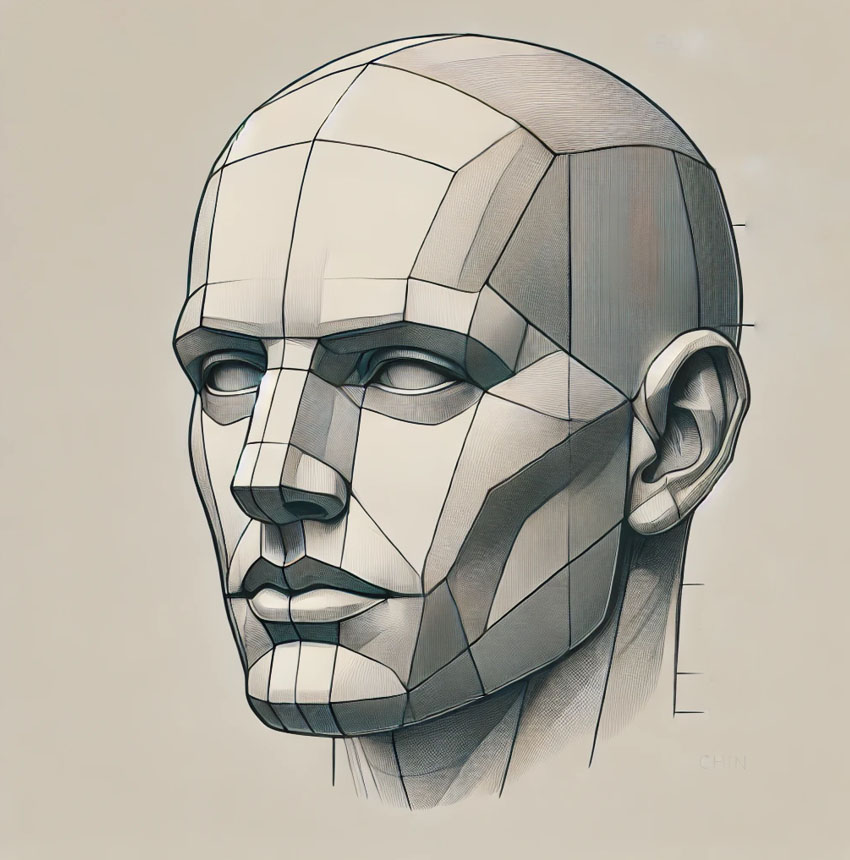
How to Study the Planes of the Face

  • Use Asaro Heads (Planes of the Head models) for a simplified geometric approach.
  • Practice sketching faces in blocky, angular forms before softening into natural curves.
  • Use lighting from different angles to observe plane changes.
  • Sculpting (even digitally) can reinforce your understanding of form.

Mixing Colors: The Art of Skin Tones

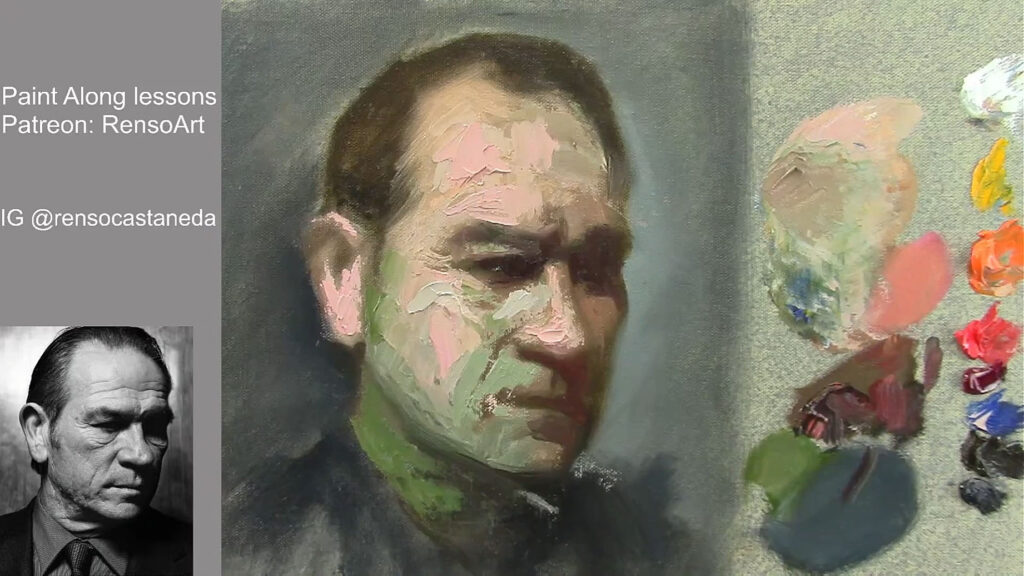
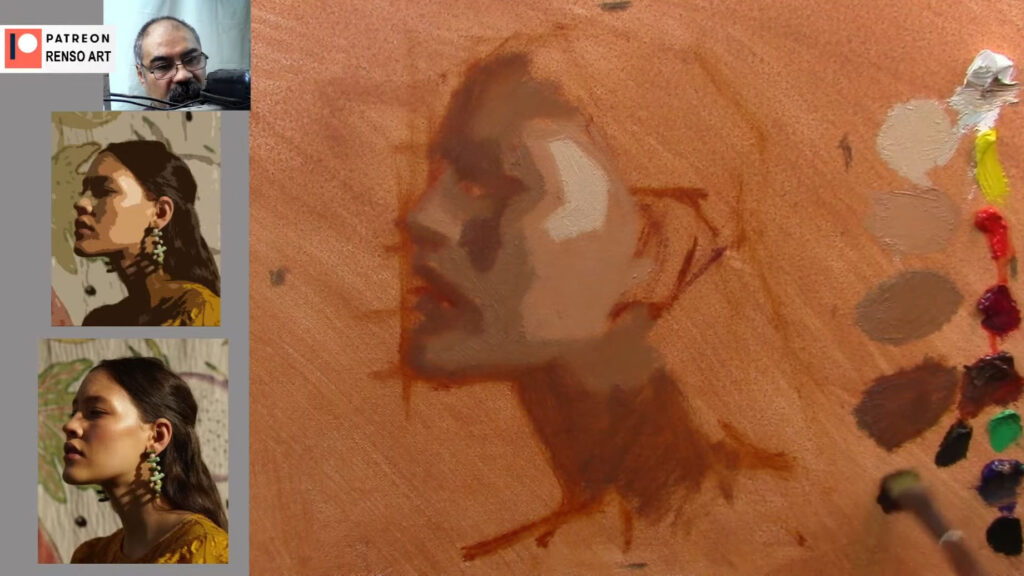
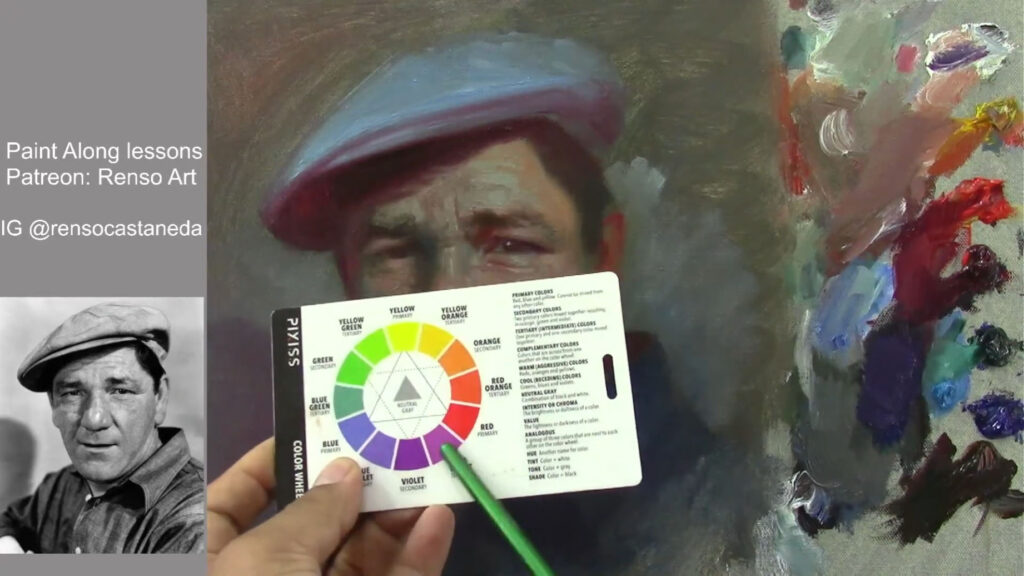
Now, let’s talk about skin tones. Mixing the perfect skin color is like trying to find the right spice blend for a recipe—it’s all about balance. You start with a base color, something close to the person’s skin tone, but then you tweak it. A little more red for the cheeks, a touch of yellow for warmth, maybe a hint of blue for cooler areas like the shadows under the chin or around the eyes.

But here’s the thing: skin isn’t just one color. It’s a symphony of tones. The forehead might be a bit yellower, the cheeks pinker, and the shadows around the jawline cooler. And don’t forget about local color—that’s the base color of an object before light and shadow affect it. For skin, the local color is usually somewhere between peach, pink, and ochre, depending on the person.

I spent a lot of time mixing variations of the base color—lighter versions for highlights, darker versions for shadows, and more saturated versions for areas like the cheeks and lips. And sometimes, I’d throw in a wild card, like a touch of blue or green, just to see how it would affect the overall harmony. It’s all about experimentation.


Shadows and Highlights: Creating Depth

Shadows are where the magic happens. They give the face its three-dimensionality. But not all shadows are created equal. Some are warm, some are cool, and some are neutral. It depends on the light source and the surrounding colors. For this portrait, I kept the shadows relatively neutral, but I added a touch of warmth to areas like the nose and cheeks to make them pop forward.

Highlights, on the other hand, are all about catching the light. The brightest highlights are usually on the forehead, the bridge of the nose, the cheekbones, and the chin. But here’s a pro tip: don’t make your highlights pure white. Mix a bit of yellow or pink into the white to keep it natural.


The Eyes: Windows to the Soul

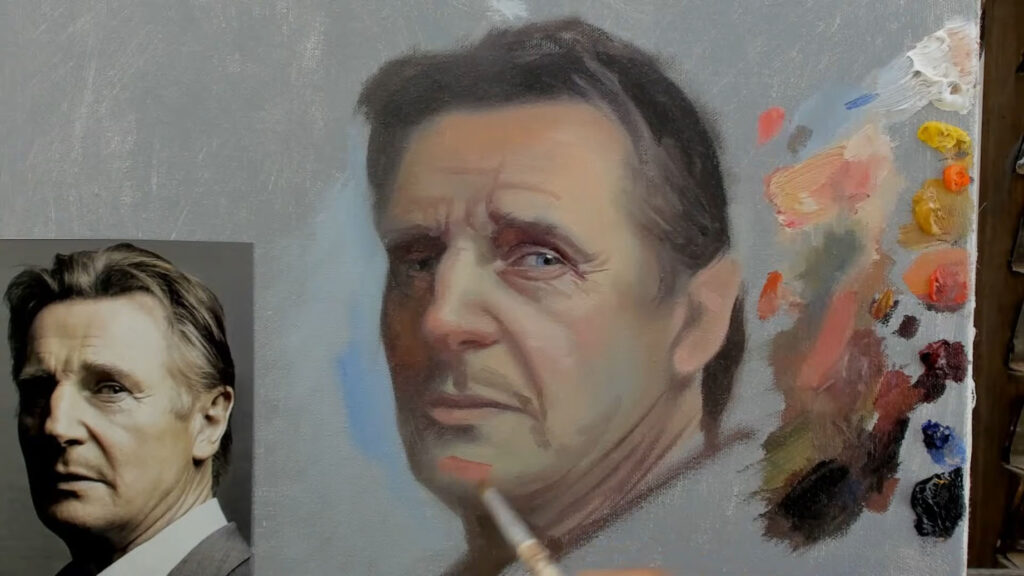
The eyes are the focal point of any portrait. They’re what people look at first, so you’ve got to get them right. But here’s the thing: eyes aren’t just white with a colored iris. They’re full of subtle colors and reflections. The whites of the eyes, for example, are rarely pure white. They’re usually a bit gray or yellowish, especially in shadow.

I spent a lot of time on the eyes, adding tiny highlights to make them look alive. And don’t forget the eyelids—they’re warmer and more reddish than the rest of the skin because they’re thinner and have more blood vessels. But you’ve got to be careful not to make them too red, or it’ll look like the person has been crying.


The Nose and Mouth: Balancing the Features

The nose and mouth are just as important as the eyes, but they’re often overlooked. The nose, for example, has its own set of planes—the bridge, the sides, the nostrils, and the tip. Each plane catches light differently, so you’ve got to pay attention to the transitions between light and shadow.

The mouth is another tricky area. It’s not just a line with some color inside. It’s a complex shape with its own highlights and shadows. The upper lip is usually darker than the lower lip, and there’s often a subtle highlight on the lower lip that gives it a moist, natural look. And don’t forget the corners of the mouth—they’re usually a bit darker and can add a lot of expression to the face.


Hair and Background: Framing the Face

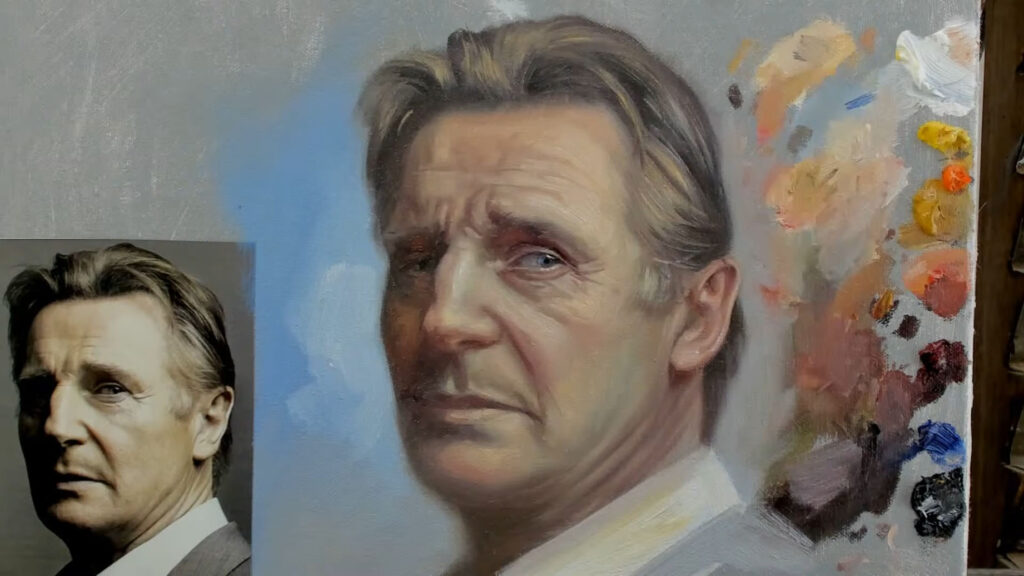
Hair can make or break a portrait. It’s not just a mass of color—it’s made up of individual strands that catch light and create texture. But for this portrait, I decided to keep the hair relatively simple. I didn’t want it to distract from the face. Instead, I focused on getting the shape and volume right, adding a few highlights here and there to suggest movement.

The background is another important element. It’s not just empty space—it’s part of the composition. I added a bit of yellow to warm up the background, but I’m not sure if I’ll keep it. Sometimes, a neutral background works better because it keeps the focus on the face.


Knowing When to Stop

Here’s the hardest part of painting a portrait: knowing when to stop. It’s so easy to keep tweaking and adjusting, but at some point, you’ve got to step back and say, “It’s done.” Overworking a painting can ruin it. You start losing the freshness and spontaneity that make it come alive.

I’ve learned to trust my instincts. If something feels off, I’ll fix it. But if it feels right, I’ll leave it alone, even if it’s not perfect. Because here’s the thing: perfection is overrated. What matters is capturing the essence of the person—their expression, their personality, their soul.


Final Thoughts

Painting a portrait is a journey. It’s about more than just getting the proportions and colors right. It’s about capturing a moment, a feeling, a story. And the planes of the face are your roadmap. They guide you through the process, helping you build the structure, add the details, and bring the face to life.

So, next time you’re painting a portrait, take a moment to study the planes of the face. Pay attention to how light and shadow interact with them. And most importantly, have fun with it. Because at the end of the day, painting is about expressing yourself and connecting with the world around you.

Happy painting! 🎨
Mastering Edges in Oil Portrait Painting: A Guide to Creating Realism and Depth

When it comes to painting a portrait in oils, one of the most overlooked yet essential skills is mastering edges. Edges refer to the transitions between shapes, colors, and values in your painting. They can be hard, soft, or lost, and how you handle them can make or break the realism of your portrait. Hard edges draw attention and create focus, while soft edges suggest depth and subtlety. Lost edges, where two shapes blend seamlessly, can add mystery and atmosphere.

In this blog post, we’ll explore why edges are so important in portrait painting, how to identify and control them, and practical tips for using them to create lifelike, dynamic portraits. Plus, don’t forget to watch the accompanying video demo, where I’ll walk you through the process of painting a portrait with a focus on mastering edges!


Why Are Edges Important in Portrait Painting?

Edges play a crucial role in creating realism and guiding the viewer’s eye through your painting. Here’s why they matter:

  1. They Create Depth and Realism: Hard edges appear closer to the viewer, while soft edges recede into the background. This helps create a sense of three-dimensionality.
  2. They Direct Focus: Sharp, hard edges draw attention to key areas like the eyes, while soft edges keep less important areas from competing for attention.
  3. They Add Atmosphere and Mood: Lost edges can create a sense of mystery or softness, adding emotional depth to your portrait.

In the video demo, I’ll show you how to use edges to bring your portrait to life.


Edges in Oil Portrait Painting

Types of Edges in Portrait Painting

Understanding the different types of edges is the first step to mastering them:

  1. Hard Edges: These are sharp, well-defined transitions between shapes or values. Use them for areas you want to emphasize, like the eyes or the outline of the nose.
  2. Soft Edges: These are gradual transitions that suggest movement or depth. Use them for areas like the cheeks, where the light gently fades into shadow.
  3. Lost Edges: These occur when two shapes blend so seamlessly that the edge disappears. Use them to create a sense of unity or to suggest subtle transitions, like where the hair meets the background.

In the video, I demonstrate how to identify and paint each type of edge in a portrait.


Edges in Oil Portrait Painting

How to Control Edges in Oil Painting

Controlling edges in oil painting requires a combination of observation, technique, and practice. Here are some tips to help you master edges:

  1. Observe Your Reference Carefully: Look for hard, soft, and lost edges in your reference photo or subject. Pay attention to how light and shadow affect the transitions between shapes.
  2. Use the Right Brushwork:
  • For hard edges, use a firm brushstroke with minimal blending.
  • For soft edges, use a softer brush and blend gently with a dry brush or your finger.
  • For lost edges, allow the colors to blend naturally on the canvas.
  1. Work from General to Specific: Start with soft edges to establish the overall form, then add hard edges for detail and focus.
  2. Step Back Frequently: View your painting from a distance to see how the edges are working together. This will help you maintain a balanced composition.

In the video demo, I’ll show you how to apply these techniques step by step.


Edges in Oil Portrait Painting

Common Mistakes to Avoid

  1. Overusing Hard Edges: Too many hard edges can make your painting look flat and cartoonish. Use them sparingly to emphasize key areas.
  2. Ignoring Soft Edges: Failing to soften edges where needed can make your portrait look stiff and unnatural.
  3. Overblending: While soft edges are important, overblending can make your painting look muddy. Use a light touch and let the paint do the work.

Watch the Video Demo!

In the video, I’ll walk you through the entire process of painting a portrait with a focus on mastering edges. You’ll see how I:

  • Analyze the reference photo for edge types.
  • Block in the portrait with soft edges to establish the overall form.
  • Add hard edges to define key features like the eyes, nose, and mouth.
  • Use lost edges to create subtle transitions and atmospheric effects.

This demo is perfect for artists of all levels who want to improve their edge control and create more realistic, dynamic portraits.


Edges in Oil Portrait Painting

Tips for Practicing Edges

  1. Do Edge Studies: Practice painting simple shapes (like spheres or cubes) with different types of edges. This will help you understand how light and shadow affect edges.
  2. Experiment with Brushwork: Try using different brushes and techniques to create hard, soft, and lost edges.
  3. Study Master Paintings: Look at how the Old Masters used edges to create depth and realism. Pay attention to how they balanced hard and soft edges in their portraits.

Edges in Oil Portrait Painting

Conclusion

Mastering edges is one of the most powerful tools you can add to your portrait painting toolkit. By understanding how to control hard, soft, and lost edges, you can create portraits that are not only realistic but also full of depth, focus, and emotion.

I hope this blog post and video demo inspire you to focus on edges in your own work. Don’t forget to watch the video to see these concepts in action, and let me know in the comments how you plan to apply these tips to your next portrait!

Happy painting! 🎨✨


How to Paint a Portrait in 35 Minutes: A Step-by-Step Demo

Have you ever wondered how to create a stunning portrait in a short amount of time? Whether you’re a beginner or an experienced artist, painting a portrait quickly and efficiently is a skill that can elevate your artistry. In this blog post, I’ll walk you through my process of painting a portrait in just 35 minutes—and don’t forget to watch the accompanying video demo where I explain each step in real time!


Why Paint a Portrait in 35 Minutes?

Painting under time constraints might sound intimidating, but it’s an excellent exercise for:

  • Improving Decision-Making: You learn to focus on the essentials and avoid overworking your piece.
  • Building Confidence: Quick studies help you trust your instincts and brushstrokes.
  • Capturing Energy: A time-limited approach often results in more dynamic and expressive work.

My Process: Step-by-Step

1. Preparation (2-3 Minutes)

Before starting, I gather my materials:

  • A primed canvas or panel
  • A limited palette of acrylic or oil paints (I use titanium white, burnt umber, ultramarine blue, cadmium red, and yellow ochre)
  • A few brushes (a large flat brush for blocking in, medium rounds for details, and a small liner for fine lines)
  • A cup of water or solvent for cleaning brushes
  • A paper towel or rag for wiping brushes

In the video, I’ll show you how I set up my workspace and mix my initial colors.


2. Blocking In the Shapes (5 Minutes)

I start by loosely sketching the basic shapes of the face using a thin brush and a neutral tone (like burnt umber mixed with a bit of ultramarine blue). This step is all about establishing proportions and placement:

  • The oval of the head
  • The centerline and eyeline
  • The rough placement of the nose, mouth, and eyes

I keep my lines light and gestural, focusing on the overall structure rather than details.

How to Paint a Portrait in 35 Minutes: A Step-by-Step Demo

3. Establishing Values (10 Minutes)

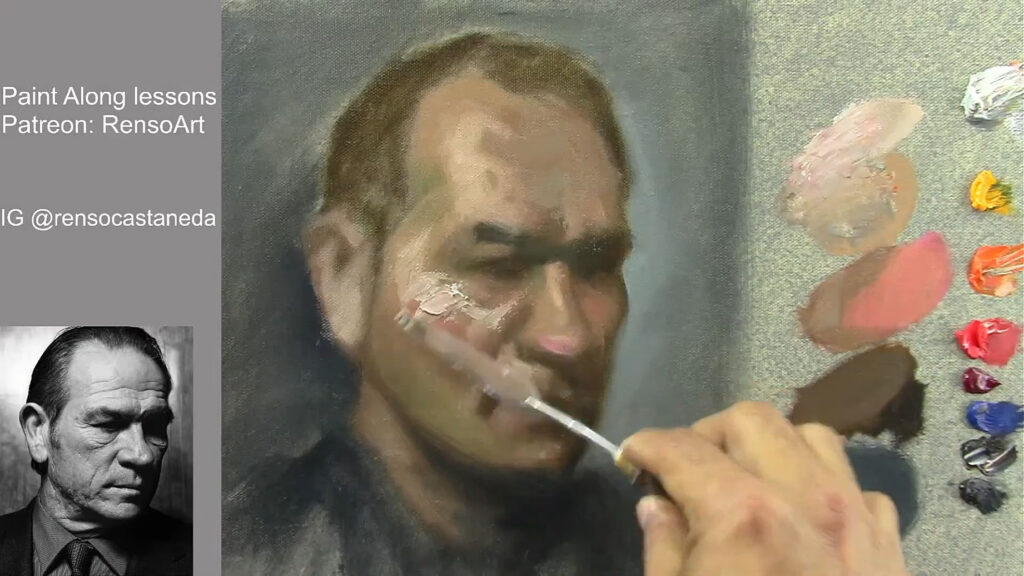
Next, I block in the major light and shadow areas using a large brush. This step is crucial for creating depth and dimension:

  • I mix a mid-tone for the shadows and a lighter tone for the highlights.
  • I focus on the big shapes: the shadow side of the face, the eye sockets, the sides of the nose, and the underplane of the chin.
  • I avoid getting caught up in small details at this stage.

In the video, I’ll explain how I simplify the face into basic value shapes and avoid overcomplicating the process.

How to Paint a Portrait in 35 Minutes: A Step-by-Step Demo

4. Adding Color and Refining (15 Minutes)

Once the values are established, I start adding color to bring the portrait to life:

  • I mix skin tones using my limited palette, adjusting for warm and cool areas.
  • I add subtle hints of red for the cheeks, lips, and nose, and cooler tones for the shadows.
  • I refine the features, paying attention to the eyes, nose, and mouth, but still keeping my brushwork loose and expressive.

This is where the portrait starts to take shape, and I’ll show you how I balance detail with spontaneity in the video.

How to Paint a Portrait in 35 Minutes: A Step-by-Step Demo

5. Final Details and Adjustments (5 Minutes)

In the final minutes, I add the finishing touches:

  • I enhance the highlights on the forehead, nose, and cheekbones.
  • I refine the eyes and lips, adding small details to make them pop.
  • I step back to assess the overall composition and make any necessary adjustments.

The key here is to know when to stop—overworking the piece can ruin the freshness and energy of the painting.

How to Paint a Portrait in 35 Minutes: A Step-by-Step Demo

Watch the Video Demo!

To see this process in action, check out the video below. I’ll walk you through each step in real time, sharing tips and techniques to help you paint a portrait quickly and confidently. Whether you’re a beginner or a seasoned artist, this demo will give you valuable insights into simplifying the portrait process.


Tips for Success

  1. Work Fast, But Thoughtfully: Speed doesn’t mean rushing—it means making deliberate, confident strokes.
  2. Focus on the Big Picture: Don’t get bogged down by details too early.
  3. Embrace Imperfections: Quick portraits are about capturing the essence, not achieving photorealism.

Painting a portrait in 35 minutes is a fun and rewarding challenge that can help you grow as an artist. I hope this blog post and video inspire you to try it for yourself! Let me know how it goes in the comments, and don’t forget to share your creations with me on social media.

Happy painting! 🎨✨


How to paint a portrait with Palette knife

Painting a portrait is a deeply rewarding artistic endeavor, but using a palette knife instead of a brush can take your work to a whole new level. Palette knife painting is known for its bold, textured, and expressive qualities, making it a unique way to capture the essence of a subject. In this blog post, I’ll walk you through the process of creating a stunning portrait with a palette knife, step by step. If you’re more of a visual learner, don’t forget to check out the accompanying video where I demonstrate each step in real time!


Why Use a Palette Knife for Portraits?

Using a palette knife for portraits is all about embracing texture, movement, and spontaneity. Unlike brushes, palette knives create thick, impasto strokes that add dimension and energy to your work. This technique encourages you to focus on shapes, colors, and textures rather than fine details, resulting in a more impressionistic or abstract style. It’s perfect for artists who want to break free from traditional methods and explore a more dynamic approach.


Materials You’ll Need

Here’s what I used in the video:

  1. Palette Knives: A variety of sizes and shapes (trowel, diamond, or angled knives work well).
  2. Canvas: Stretched canvas or canvas board.
  3. Acrylic or Oil Paints: I used oils for their blendability, but acrylics work great too.
  4. Palette: For mixing colors.
  5. Reference Photo: A clear image of your subject.
  6. Easel: To keep your canvas upright.
  7. Paper Towels or Rags: For cleaning your knife between colors.

Step 1: Prepare Your Reference and Canvas

In the video, I start by selecting a high-quality reference photo with good lighting and clear features. I then sketch the basic outline of the portrait onto the canvas using a pencil. Keep the sketch loose—this is just a guide to help you place the major features like the eyes, nose, mouth, and hairline.


Step 2: Mix Your Colors

Palette knife painting relies heavily on color mixing. In the video, I show you how to create a range of skin tones, shadows, and highlights on your palette. Don’t aim for perfection—slight variations in color will add depth and realism to your portrait. Remember, you can always layer and adjust as you go.


How to paint a portrait with Palette knife

Step 3: Build the Base Layers

Using a medium-sized brush, I start blocking in the larger shapes of the face. Focus on the mid-tone colors first, applying the paint kind of thin. at this stage I need more control to get the likeness, gradually adding shadows and highlights. It is just the beginning , avoid getting caught up in details—think about the face in terms of planes and shapes.

How to paint a portrait with Palette knife

Step 4: Add Texture and Dimension

This is where the palette knife truly shines. In the video, I demonstrate how to use the edge of the knife to carve out sharp lines for features like the nose, lips, and jawline. For softer areas like cheeks and forehead, I use the flat side of the knife to blend and layer colors. Experiment with different angles and pressures to create varied textures.

How to paint a portrait with Palette knife

Step 5: Refine the Features

Once the base layers are in place, I start refining the facial features. Using a smaller brush, I add details like the eyes, eyebrows, and lips. Remember, you don’t need to paint every detail—suggesting features with bold strokes can be just as effective.

How to paint a portrait with Palette knife

Step 6: Work on the Hair and Clothing

Hair is a great opportunity to play with texture. In the video, I show you how to use quick, directional strokes to mimic the flow of hair. Don’t be afraid to leave some areas rough and unfinished—it adds to the expressive quality of the piece. For clothing, I focus on capturing the folds and shadows with broad, expressive strokes.


Step 7: Step Back and Evaluate

At the end of the video, I take a step back from the painting to assess the overall composition. I look for areas that need more contrast, texture, or color and make any final adjustments. Remember, palette knife paintings often look best when they retain a sense of spontaneity, so try not to overwork the piece.

How to paint a portrait with Palette knife

Tips for Success

  • Embrace Imperfection: Palette knife painting is all about bold, expressive strokes. Don’t stress over small mistakes—they add character to your work.
  • Layer Wisely: Allow layers to dry slightly before adding new ones, especially if you’re using oils. This prevents colors from muddying.
  • Experiment with Pressure: Light pressure creates thin, delicate strokes, while heavy pressure produces thick, textured marks.
  • Practice Patience: Palette knife painting can be challenging at first, but with practice, you’ll develop a feel for the tool and its possibilities.

Watch the Video!

If you’re curious to see how I bring this portrait to life with a palette knife, be sure to watch the accompanying video. I walk you through each step in real time, sharing tips and techniques along the way. Whether you’re a beginner or an experienced artist, this video will inspire you to pick up a palette knife and start creating!

How to paint a portrait with Palette knife

Conclusion

Painting a portrait with a palette knife is a thrilling way to explore texture, color, and form. It encourages you to think differently about your subject and embrace a more tactile, expressive approach. Whether you’re following along with this blog post or watching the video, I hope you feel inspired to try this technique for yourself.

Have you tried painting with a palette knife? Share your experiences and tips in the comments below—I’d love to hear from you! And don’t forget to like, share, and subscribe for more art tutorials and inspiration. Happy painting! 🎨
How to Paint a Portrait: A Step-by-Step Guide to Capturing Likeness and Depth

Painting a portrait is both an art and a science. It requires a balance of technical skill, observation, and creativity. In this blog post, I’ll walk you through my process of painting a portrait, from the initial sketch to the final touches. Whether you’re a beginner or an experienced artist, these steps will help you create a portrait that captures both the likeness and the essence of your subject.

Step 1: Start with a Sketch

Every great portrait begins with a solid sketch. I always start by placing the face on the canvas and marking the centerline. This helps me maintain symmetry and proportion. I then measure the distances between key facial features, such as the eyebrows, nose, and chin. These measurements serve as a guide, even though faces aren’t perfectly symmetrical.

To simplify the process, I squint my eyes to focus on the major shapes and shadows. This technique helps me block in the basic structure without getting overwhelmed by details. For example, I’ll sketch the eye sockets, the nasal bone, and the jawline, using simple shapes like circles and rectangles to map out the face.

A Step-by-Step Guide to Capturing Likeness and Depth

Step 2: Understand the Anatomy

Understanding the underlying anatomy of the face is crucial. I think of the skull as the foundation of the portrait. By visualizing the zygomatic bone (cheekbone), the maxilla (upper jaw), and the mandible (lower jaw), I can better understand how light and shadow fall on the face.

For instance, I know that the highlight on the cheekbone is there because of the underlying bone structure. This knowledge helps me place highlights and shadows accurately, even if I’m working from a reference photo. It’s like having an internal compass that guides me through the painting process.

A Step-by-Step Guide to Capturing Likeness and Depth

Step 3: Build Layers with Color

Once the sketch is complete, I start adding color. I begin with a muted base, often mixing Titanium White and Raw Umber to create a grayish tone. This neutral base allows me to build up colors gradually. I then add warmer tones, like reds and oranges, to the cheeks, nose, and ears, and cooler tones, like greens and blues, to the shadows.

I use thin layers of paint at first, gradually building up the thickness. This approach gives me more control over the final result. For example, I’ll mix Cadmium Red and a touch of black to create a warm, reddish tone for the lips, and then blend it softly into the surrounding skin tones.

Step 4: Focus on Light and Shadow

Light and shadow are what give a portrait depth and dimension. I always start by identifying the light source in my reference photo. This helps me determine where the highlights and shadows should fall.

For example, if the light is coming from the top left, I’ll add highlights to the left side of the forehead, cheekbone, and nose. I’ll also deepen the shadows on the right side of the face, under the chin, and around the eyes. By carefully controlling the values (the lightness or darkness of the colors), I can create a sense of volume and realism.

A Step-by-Step Guide to Capturing Likeness and Depth

Step 5: Refine the Details

As the painting progresses, I focus on refining the details. I soften some edges to create a more natural look, while keeping others sharp to define the contours of the face. For example, I’ll soften the edges around the cheeks and forehead but keep the nose and jawline more defined.

I also pay attention to subtle color variations. For instance, I’ll add a touch of green to the shadows under the eyes and reddish tones to the ears and chin. These small details bring the portrait to life and add a sense of realism.

Step 6: Add Texture and Depth

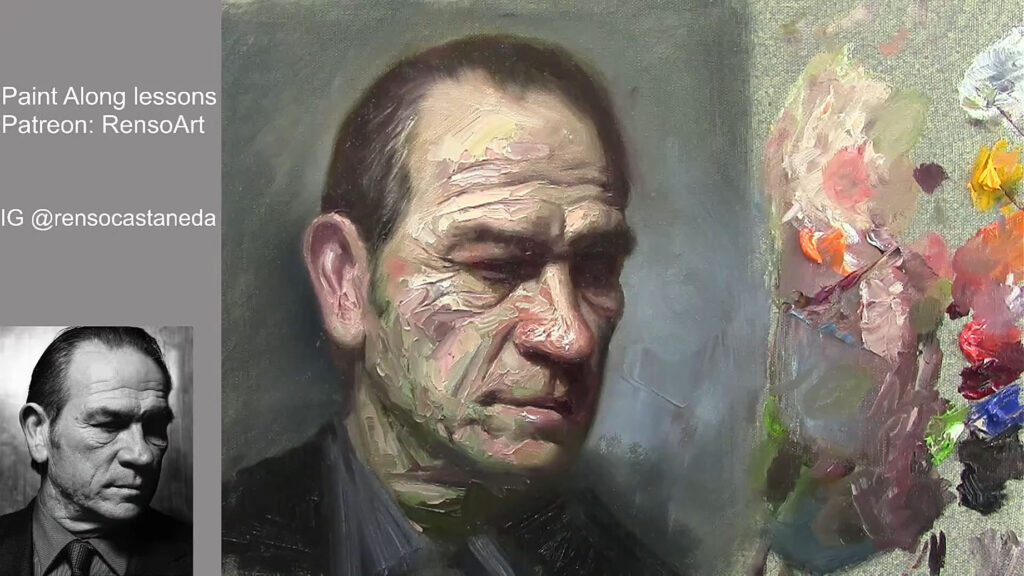
Texture is an essential element in my portraits. I use thick brushstrokes to add dimension to the face, especially in areas like the beard or the contours of the cheeks. This technique not only enhances the visual appeal but also adds a tactile quality to the painting.

For example, I’ll use a dry brush to create the texture of stubble on the chin or the fine lines around the eyes. These details make the portrait feel more lifelike and engaging.

A Step-by-Step Guide to Capturing Likeness and Depth

Step 7: Final Touches

In the final stages, I step back and assess the painting as a whole. I look for areas that need more contrast, texture, or refinement. For example, I might add more highlights to the forehead or deepen the shadows under the chin to create more depth.

I also pay attention to the background. A well-chosen background can enhance the portrait without overpowering it. For this painting, I chose a neutral gray background, which allows the face to stand out while adding a sense of balance to the composition.

A Step-by-Step Guide to Capturing Likeness and Depth

Tips for Success

  1. Practice Observation: Spend time studying your subject and understanding the relationships between light, shadow, and color.
  2. Start Thin: Begin with thin layers of paint and gradually build up the thickness. This approach gives you more control over the final result.
  3. Understand Anatomy: Knowing the underlying structure of the face will help you place highlights and shadows accurately.
  4. Experiment with Texture: Don’t be afraid to use thick brushstrokes to add dimension and interest to your painting.
  5. Know When to Stop: It’s easy to overwork a painting. Step back regularly and assess your progress to avoid going too far with details.

Conclusion

Painting a portrait is a journey of observation, creativity, and patience. By following these steps and trusting your instincts, you can create a portrait that captures both the likeness and the essence of your subject. Remember, there are no strict rules in art—only possibilities. So, grab your brushes, set up your palette, and let your creativity flow.

Happy painting!

— Renso

The Importance of Values in Portrait Painting: A Comprehensive Guide to Mastering Light and Shadow

Creating a compelling portrait is one of the most rewarding challenges an artist can undertake. But what separates a flat, lifeless portrait from one that feels alive and three-dimensional? The answer lies in understanding and mastering values. Values—the lightness or darkness of a color—are the backbone of any successful painting. They define the structure of the face, create depth, and bring realism to your work. Even if your colors are vibrant and accurate, a portrait with poorly executed values will lack impact.

In this blog post, we’ll dive deep into the importance of values in portrait painting. We’ll explore what values are, why they matter, and how to use them effectively to create stunning, realistic portraits. Plus, don’t forget to watch the accompanying video demo, where I’ll walk you through the entire process of painting a portrait with a strong focus on values. Whether you’re a beginner or an experienced artist, this guide will help you elevate your portrait painting skills.


What Are Values, and Why Are They So Important?

Values refer to how light or dark a color is, regardless of its hue. In portrait painting, values are essential because they define the form and structure of the face. Here’s why they matter:

  1. They Create Depth and Dimension: Values help distinguish between the planes of the face, making it look three-dimensional. Without proper values, a portrait can appear flat and lifeless.
  2. They Establish Contrast: The interplay of light and shadow adds drama and interest to your painting. Strong contrasts can make your portrait more dynamic and engaging.
  3. They Guide the Viewer’s Eye: Well-defined value patterns can direct attention to the focal points of your portrait, such as the eyes or mouth.
  4. They Simplify Complexity: By breaking down the face into light and dark shapes, values help you simplify complex features and focus on the big picture.

In the video demo, I’ll show you how to use values to transform a flat sketch into a realistic, three-dimensional portrait.

The Importance of Values in Portrait Painting

How to See and Understand Values

Training your eye to see values is a skill that takes practice, but it’s absolutely essential for creating realistic portraits. Here are some tips to help you develop this skill:

  1. Squint Your Eyes: Squinting simplifies the image, allowing you to see the major light and dark shapes without getting distracted by details. This is a great way to identify the overall value structure of a face.
  2. Use a Black-and-White Reference: Converting your reference photo to grayscale removes the distraction of color, making it easier to focus on values. You can also use a grayscale filter on your phone or computer to help with this.
  3. Identify the Light Source: Determine where the light is coming from and how it affects the planes of the face. This will help you understand where the highlights, midtones, and shadows should be.
  4. Practice Value Studies: Spend time drawing or painting portraits using only black, white, and gray. This will help you focus on values without the added complexity of color.

In the video, I’ll demonstrate how I analyze values in a reference photo and translate them into my painting.

The Importance of Values in Portrait Painting

The Value Structure of a Portrait

To paint a realistic portrait, it’s helpful to break down the face into a simple value structure. Here’s how I approach it:

  1. Light Areas: These are the parts of the face that catch the most light, such as the forehead, cheekbones, nose, and chin. These areas will have the lightest values in your painting.
  2. Midtones: These are the transitional areas between light and shadow, such as the sides of the face, the lower cheeks, and the area around the mouth. Midtones help create a smooth transition between light and dark.
  3. Shadow Areas: These are the parts of the face that receive little to no light, such as the eye sockets, under the nose, under the chin, and the sides of the neck. These areas will have the darkest values in your painting.

By simplifying the face into these three value groups, you can create a strong foundation for your portrait. Once the basic value structure is in place, you can refine the details and add subtle shifts in value to create a more realistic effect.


The Importance of Values in Portrait Painting

Common Mistakes to Avoid

Even experienced artists can struggle with values from time to time. Here are some common mistakes to watch out for:

  1. Overcomplicating Values: Beginners often try to include too many subtle shifts in value, which can make the painting look muddy and overworked. Start with broad value shapes and refine later.
  2. Ignoring the Light Source: Inconsistent lighting can make your portrait look unnatural. Always keep the light source in mind and ensure that your highlights and shadows are consistent.
  3. Relying Too Much on Color: Color can be deceptive. A vibrant color might still be dark in value, so always check your values independently of color.
  4. Neglecting Edges: The transition between light and shadow (also known as the edge) is just as important as the values themselves. Soft edges create a sense of realism, while hard edges can add drama and focus.

In the video demo, I’ll show you how to avoid these mistakes and create a balanced, realistic portrait.

The Importance of Values in Portrait Painting

Watch the Video Demo!

In the video, I’ll walk you through the entire process of painting a portrait with a strong focus on values. You’ll see how I:

  • Analyze the reference photo for value patterns.
  • Block in the major light and shadow areas.
  • Refine the values to create a realistic, three-dimensional effect.
  • Add subtle details and transitions to bring the portrait to life.

This demo is perfect for artists of all levels who want to improve their understanding of values and take their portrait painting to the next level.

The Importance of Values in Portrait Painting

Tips for Practicing Values in portrait painting

  1. Do Value Studies: Practice painting or drawing portraits using only black, white, and gray. This will help you focus on values without the distraction of color.
  2. Use a Limited Palette: When working with color, limit your palette to avoid overwhelming yourself. This will help you concentrate on value relationships.
  3. Study Master Paintings: Look at how the Old Masters used values to create depth and realism in their portraits. Pay attention to how they simplified complex forms into light and shadow.
  4. Experiment with Lighting: Try painting the same subject under different lighting conditions to see how it affects the values.

The Importance of Values in Portrait Painting

Conclusion

Mastering values is one of the most important skills you can develop as an artist. It’s the key to creating portraits that feel alive, three-dimensional, and full of depth. By understanding how light interacts with the planes of the face and simplifying complex forms into basic value shapes, you can take your portrait painting to the next level.

I hope this blog post and video demo inspire you to focus on values in your own work. Don’t forget to watch the video to see these concepts in action, and let me know in the comments how you plan to apply these tips to your next portrait!

Happy painting! – Values in portrait painting🎨✨

The Importance of Values in Portrait Painting

Painting a Portrait with the Zorn Palette

The Magic of the Zorn Palette: Painting Portraits with Timeless Elegance

The Zorn Palette, named after the Swedish master Anders Zorn, is a testament to the power of simplicity in art. Comprising just four colors—yellow ochre, ivory black, cadmium red (or vermilion), and titanium white—this limited palette has been used for over a century to create stunning, lifelike portraits. Its ability to produce a wide range of natural skin tones and harmonious compositions makes it a favorite among artists, from beginners to seasoned professionals. In this blog post, we’ll explore the allure of the Zorn Palette, its historical significance, and how you can harness its magic to create captivating portraits.


Here is a livestream showing how I use the Zorn Palette.

What Makes the Zorn Palette Special?

The Zorn Palette is more than just a set of colors; it’s a philosophy of restraint and focus. Here’s why it stands out:

  1. Simplicity: With only four colors, the palette eliminates the overwhelm of choice, allowing artists to focus on value, composition, and brushwork.
  2. Versatility: Despite its limited range, the Zorn Palette can produce an astonishing variety of tones, from warm highlights to cool shadows.
  3. Timelessness: The muted, earthy colors evoke a classic, almost universal quality that transcends trends and styles.
  4. Efficiency: Mixing colors is straightforward, making it ideal for plein air painting or quick studies.

The Colors of the Zorn Palette

Let’s break down the four colors and their roles:

  • Yellow Ochre: This warm, earthy yellow forms the foundation of skin tones and mid-tones. It’s perfect for capturing the natural warmth of the human face.
  • Ivory Black: Contrary to its name, ivory black is a cool, bluish-black that can be mixed with white to create a range of grays. It’s essential for shadows and cooler tones.
  • Cadmium Red (or Vermilion): This vibrant red adds warmth and richness, especially in the cheeks, lips, and other flushed areas of the skin.
  • Titanium White: Used for highlights and to lighten colors, titanium white brings luminosity and contrast to the painting.

The Historical Significance of the Zorn Palette

Anders Zorn (1860–1920) was a Swedish painter known for his masterful portraits and depictions of rural life. While there’s debate over whether Zorn exclusively used this limited palette, his works undeniably showcase its principles. Zorn’s ability to create lifelike skin tones and atmospheric depth with such a restricted range of colors has inspired generations of artists.

The Zorn Palette’s influence extends beyond Zorn himself. It aligns with the traditions of the Old Masters, who often worked with limited palettes to achieve harmony and cohesion in their paintings. Today, it remains a popular choice for artists seeking to simplify their process while maintaining a high level of realism.


Why the Zorn Palette Works for Portraits

Portraits are all about capturing the essence of a person, and the Zorn Palette excels at this. Here’s why:

  1. Natural Skin Tones: The combination of yellow ochre, cadmium red, and ivory black creates a range of warm and cool tones that mimic the subtleties of human skin.
  2. Harmonious Compositions: The limited palette ensures that all colors in the painting relate to one another, creating a cohesive and balanced composition.
  3. Focus on Value: By reducing the complexity of color, the Zorn Palette encourages artists to focus on value (light and dark), which is crucial for achieving realism.
  4. Emotional Depth: The muted, earthy tones evoke a sense of timelessness and emotional depth, making the portrait feel intimate and authentic.

Tips for Painting with the Zorn Palette

If you’re new to the Zorn Palette, here are some tips to help you get started:

  • Start with a Sketch: Begin with a light pencil or paint sketch to establish the proportions and placement of facial features.
  • Block in Shadows First: Use a mixture of ivory black and cadmium red to block in the darkest areas of the portrait. This will help you establish the structure of the face.
  • Build Up Mid-Tones: Use yellow ochre and cadmium red to create warm mid-tones for the skin. Adjust the ratio of colors to match the specific tones of your subject.
  • Add Highlights Sparingly: Use titanium white to create highlights, but be careful not to overdo it. Subtle highlights can bring the portrait to life.
  • Experiment with Brushwork: Vary your brushstrokes to create texture and interest, especially in areas like hair and clothing.
  • Embrace Imperfection: The Zorn Palette’s simplicity encourages a loose, painterly style. Don’t be afraid to let your brushwork show.

Famous Artists Who Used the Zorn Palette

While Anders Zorn is the most famous proponent of this palette, other artists have also embraced its simplicity and effectiveness. (not on all of theirs works) For example:

  • John Singer Sargent: Known for his masterful portraits, Sargent often used a limited palette to achieve harmony and realism.
  • Joaquín Sorolla: The Spanish painter’s luminous works demonstrate the power of restrained color choices.
  • Contemporary Artists: Many modern artists continue to use the Zorn Palette for its timeless appeal and practical benefits.

Conclusion: The Timeless Appeal of the Zorn Palette

The Zorn Palette is more than just a set of colors; it’s a gateway to understanding the fundamentals of painting. By limiting your palette, you can focus on what truly matters—value, composition, and emotion. Whether you’re a beginner looking to simplify your process or an experienced artist seeking a new challenge, the Zorn Palette offers a timeless approach to portraiture.

So, grab your paints, embrace the simplicity, and see where the Zorn Palette takes you. Who knows? You might just discover a new favorite way to paint.

Have you tried painting with the Zorn Palette? Share your experiences and tips in the comments below! And if you’re new to this technique, we’d love to hear about your first attempt. Happy painting! 🎨✨


How to paint a Portrait with Water Mixable Oils

Painting a portrait is a rewarding artistic endeavor, and using water mixable oils makes the process more accessible and less messy than traditional oils. Whether you’re a beginner or an intermediate artist, this guide will walk you through the steps to create a stunning portrait using water-mixable oils. Plus, we’ve included a helpful video tutorial to guide you visually!


Why Choose Water Mixable Oils?

Water mixable oils combine the rich, blendable qualities of traditional oils with the convenience of water-based paints. Here’s why they’re great for portraits:

  • Easy Cleanup: Clean your brushes with water instead of harsh solvents.
  • Low Odor: Perfect for artists who are sensitive to the strong smell of traditional oils.
  • Versatility: Can be used thickly like traditional oils or thinned with water for a watercolor-like effect.
  • Drying Time: They dry faster than traditional oils but still allow for blending and reworking.

Materials You’ll Need

Before you start, gather these materials:

  • Water mixable oil paints (basic colors: titanium white,cad yellow, cad red, alizarin crimson, burnt umber, ultramarine blue, ivory black).
  • Brushes (a variety of sizes, including fine detail brushes).
  • Canvas or primed painting surface.
  • Palette for mixing colors.
  • Water for thinning and cleaning.
  • Paper towels or rags.
  • Optional: Mediums like water mixable linseed oil for added flow. I just use water on the video.

Step 1: Prepare Your Workspace

Set up your canvas on an easel or flat surface. Ensure you have good lighting to see the details of your subject. Lay out your paints, brushes, and water containers within easy reach.

Step 2: Choose a Reference Photo

Select a clear, high-resolution photo of your subject. Pay attention to the lighting and expression, as these will influence the mood of your portrait. If you’re new to portraiture, choose a photo with simple lighting and minimal shadows.


Step 3: Sketch the Outline

Using a pencil or a thin brush with diluted paint, lightly sketch the basic shapes of the face. Focus on the placement of the eyes, nose, mouth, and ears. Don’t worry about details at this stage—just establish the proportions and composition.


Portrait with Water Mixable Oils

Step 4: Block in the Base Colors

Start by applying thin layers of paint to block in the main colors of the face, hair, and background. Use larger brushes for this step and keep the paint diluted with water for easier application. Focus on the overall shapes and avoid getting bogged down in details.

Portrait with Water Mixable Oils

Step 5: Build Up the Layers

Once the base layer is dry (water-mixable oils dry faster than traditional oils, but you can still blend for a few hours), begin adding more layers to define the features. Use smaller brushes for details like the eyes, nose, and lips. Pay attention to the shadows and highlights to create depth and dimension.


Step 6: Refine the Details

As you progress, refine the details of the face. Add texture to the skin, define the hair, and enhance the expression. Use a fine brush for intricate areas like the eyelashes and eyebrows. Don’t forget to step back occasionally to assess the overall balance of your portrait.

Portrait with Water Mixable Oils

Step 7: Add the Background

The background should complement the subject without overpowering it. Use softer colors and less detail to keep the focus on the face. You can blend the edges of the portrait into the background for a seamless look.


Step 8: Final Touches

Review your portrait and make any final adjustments. Add highlights to the eyes and lips to bring them to life. Soften any harsh lines and ensure the skin tones are blended smoothly. Sign your work in the corner once you’re satisfied.


Portrait with Water Mixable Oils

Tips for Success

  • Work from General to Specific: Start with broad shapes and gradually add details.
  • Use a Limited Palette: Mixing fewer colors will help maintain harmony in your portrait.
  • Experiment with Water: Use more water for a translucent effect or less for thicker, impasto textures.
  • Practice Patience: Allow layers to dry before adding new details to avoid muddy colors.

Video Tutorial

To make this process even easier, we’ve created a step-by-step video tutorial! Watch as we demonstrate each stage of painting a portrait with water-mixable oils, from the initial sketch to the final touches. Follow along and pause as needed to work at your own pace.

Portrait with Water Mixable Oils

Conclusion

Painting a portrait with water-mixable oils is a fulfilling experience that combines the richness of oil paints with the convenience of water-based mediums. With practice and patience, you’ll be able to create lifelike, expressive portraits that capture the essence of your subject. Don’t forget to share your finished work in the comments below—we’d love to see your creations!

Happy painting! 🎨✨

The Anatomy of the Face: A Guide for Artists

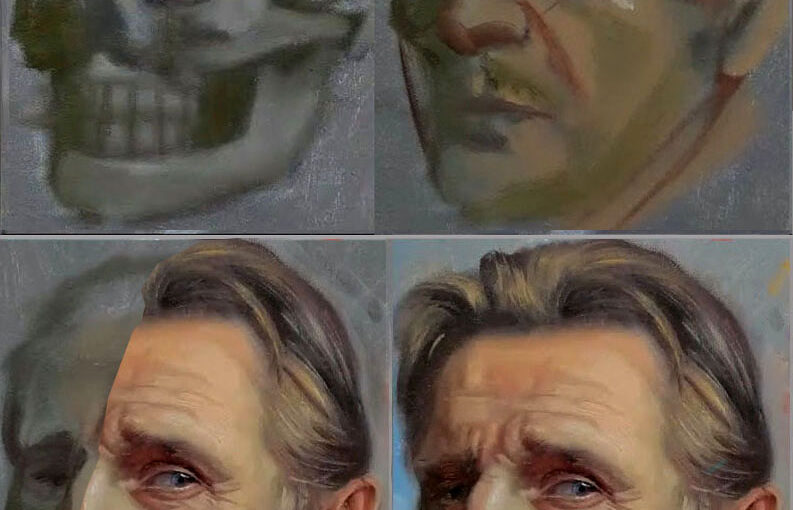
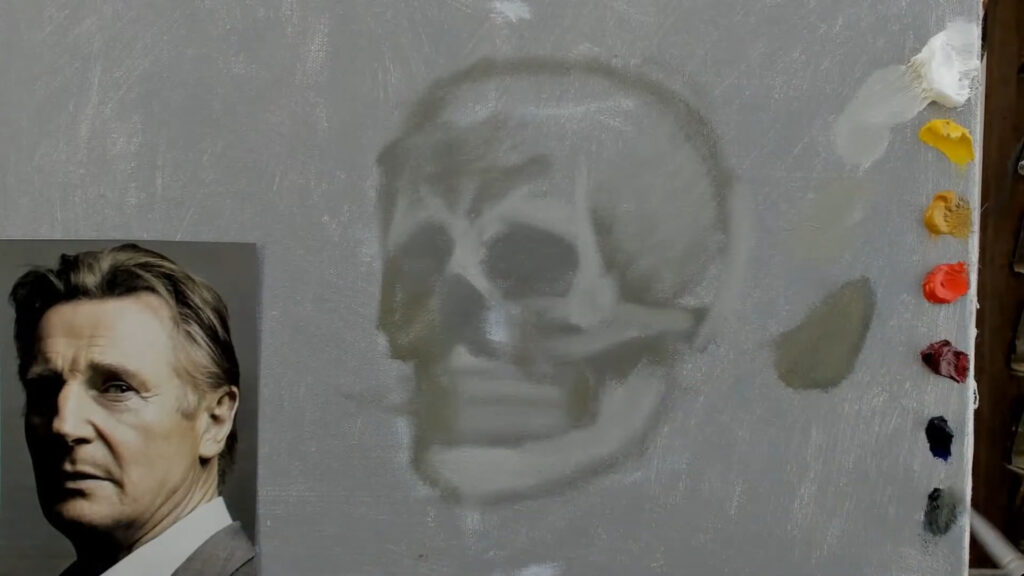
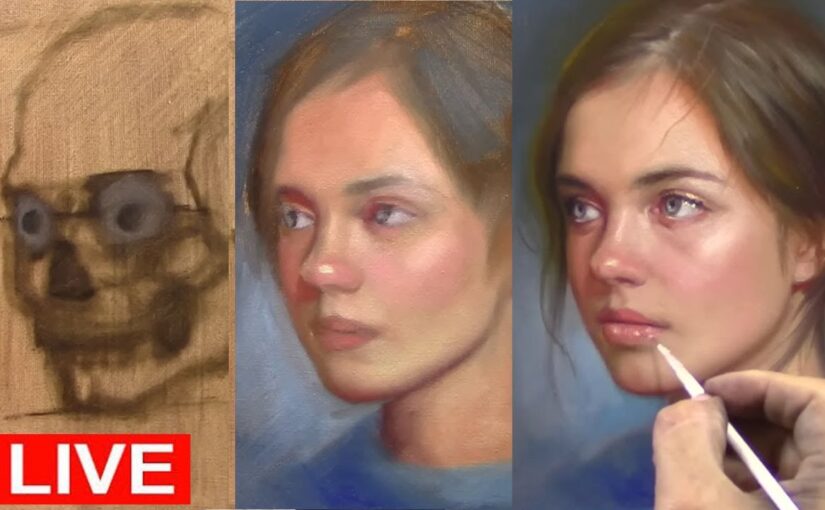
Creating a realistic portrait is more than just capturing the surface features—it’s about understanding what lies beneath. As an artist, studying the anatomy of the face is crucial for achieving accuracy, depth, and realism in your work. Recently, I painted an oil portrait starting with a detailed skull drawing and building the face on top. This process reminded me how essential facial anatomy is to creating lifelike art. In this article, we’ll explore the key elements of facial anatomy and how you can use this knowledge to improve your portraits.


Why Study the Anatomy of the face?

Understanding the anatomy of the face allows you to:

  • Create Realistic Proportions: Knowing the underlying structure helps you place features correctly.
  • Add Depth and Dimension: By visualizing the bones and muscles, you can better depict light, shadow, and form.
  • Capture Expressions: Muscles are responsible for facial movements, so understanding them helps you convey emotion.
  • Build Confidence: When you know what’s beneath the skin, you can paint or draw with greater accuracy and intention.

The Foundation: The Skull

The skull is the framework of the face. Its shape determines the overall structure, proportions, and placement of facial features. Here are the key parts of the skull to focus on:

  1. Cranium: The rounded top part of the skull that houses the brain.
  2. Orbit (Eye Sockets): The hollow spaces where the eyes sit. Their shape affects the appearance of the eyes and eyebrows.
  3. Nasal Cavity: The bony structure that supports the nose.
  4. Zygomatic Bones (Cheekbones): These bones create the prominence of the cheeks.
  5. Maxilla and Mandible (Upper and Lower Jaw): These bones define the shape of the mouth and chin.

When starting a portrait, sketching the skull first can help you establish the correct proportions and placement of features.


The Muscles of the Face

The muscles of the face are responsible for expressions and give the face its shape and movement. Here are the most important ones for artists to know:

  1. Frontalis: Located in the forehead, this muscle raises the eyebrows and creates horizontal lines.
  2. Orbicularis Oculi: Surrounds the eyes and controls blinking and squinting.
  3. Zygomaticus Major and Minor: These muscles pull the corners of the mouth upward, creating a smile.
  4. Orbicularis Oris: Encircles the mouth and controls lip movements like puckering or closing.
  5. Masseter: A strong muscle in the jaw that helps with chewing and defines the jawline.
  6. Buccinator: Located in the cheeks, this muscle helps with chewing and creates the rounded shape of the cheeks.

Understanding these muscles helps you depict expressions and add realism to your portraits.


Key Features and Their Anatomy

Let’s break down the major facial features and their underlying anatomy:

Eyes

  • The eyes sit within the orbits (eye sockets) and are protected by the eyelids.
  • The eyeball itself is spherical, but only a portion is visible.
  • The eyelids have thickness and cast shadows, which are important to capture.

Nose

  • The nose is supported by the nasal bones and cartilage.
  • The bridge of the nose is bony, while the tip and nostrils are softer and more flexible.
  • Shadows under the nose and along the sides are key to creating depth.

Mouth

  • The mouth is shaped by the orbicularis oris muscle and supported by the teeth and jaw.
  • The upper lip often has a slight “M” shape, while the lower lip is fuller.
  • Pay attention to the philtrum (the groove above the upper lip) and the shadows around the mouth.

Ears

  • The ears are made up of cartilage and have a complex shape with ridges and folds.
  • They align with the brow line at the top and the base of the nose at the bottom.

How to Practice Facial Anatomy

  1. Study the Skull
    Draw or paint the skull from different angles to understand its structure.
  2. Observe Muscle Movement
    Watch how facial expressions change the shape of the face. Use a mirror or reference photos.
  3. Layer Your Work
    Start with a skull sketch, then add muscles, and finally build the skin and features on top.
  4. Use Anatomical References
    Invest in anatomy books or use online resources to study the face in detail.
  5. Practice Consistently
    Incorporate anatomical studies into your regular art practice.

Applying Anatomy in Your Art

When I painted my recent oil portrait, I began with a skull drawing. This helped me establish the proportions and placement of the features. As I added layers of paint, I kept the underlying anatomy in mind, ensuring that the face had depth and structure.

Here are some tips for applying the anatomy of the face in your work:

  • Start with the Skull: Use it as a guide for proportions and feature placement.
  • Visualize the Muscles: Think about how they shape the face and create expressions.
  • Focus on Shadows and Highlights: Use light to emphasize the three-dimensional structure of the face.
  • Keep Practicing: The more you study anatomy, the more intuitive it will become.

Conclusion

The anatomy of the face is the foundation of great portraiture. By understanding the skull, muscles, and features, you can create artwork that is not only accurate but also full of life and emotion. Whether you’re painting in oils, drawing, or sculpting, taking the time to study anatomy will elevate your art to the next level.

So, grab your sketchbook, study those bones and muscles, and watch your portraits come to life! 🎨✨


The planes of the face

Understanding the Planes of the Face: A Guide for Artists

If you’ve ever struggled to capture the realism and depth of a face in your artwork, understanding the planes of the face can be a game-changer. Whether you’re painting portraits, sculpting, or drawing, breaking down the face into its fundamental planes is the key to creating accurate, three-dimensional representations. In this article, we’ll explore what the planes of the face are, why they matter, and how you can use them to improve your art.


What Are the Planes of the Face?

The planes of the face refer to the flat or slightly curved surfaces that make up the structure of the head. Think of the face as a complex geometric shape rather than a smooth, rounded surface. By identifying and understanding these planes, you can better visualize how light and shadow interact with the face, creating a sense of volume and realism.

The face can be divided into major planes (larger areas like the forehead, cheeks, and jaw) and minor planes (smaller, more detailed areas like the nose, lips, and eye sockets). Together, these planes form the foundation of facial structure.


The planes of the face

Why Are the Planes of the Face Important?

  1. Creates Realism
    Understanding the planes helps you accurately depict light, shadow, and depth, making your portraits look more lifelike.
  2. Simplifies Complex Shapes
    Breaking the face into planes makes it easier to tackle the complexity of facial features. It’s like solving a puzzle—one piece at a time.
  3. Improves Proportion and Symmetry
    By focusing on the planes, you can better map out the proportions of the face and ensure symmetry in your work.
  4. Enhances Your Understanding of Anatomy
    Studying the planes deepens your knowledge of facial anatomy, which is essential for any artist working with portraits.
The planes of the face

Key Planes of the Face

Here’s a breakdown of the major and minor planes to look for:

Major Planes

  1. Forehead: A large, slightly curved plane that transitions into the temples.
  2. Cheeks: Angular planes that slope downward from the cheekbones to the jaw.
  3. Jawline: A defined plane that curves around the chin.
  4. Chin: A small, rounded plane that protrudes slightly.

Minor Planes

  1. Nose: Composed of multiple planes, including the bridge, sides, and tip.
  2. Eyes: The eye sockets are deep, curved planes, while the eyelids have their own subtle planes.
  3. Lips: The upper and lower lips each have distinct planes, with a slight curve and a central ridge.
  4. Ears: Made up of several small, interconnected planes.

How to Practice Drawing the Planes of the Face

  1. Study Reference Images
    Look at photos or sculptures that highlight the planes of the face. Pay attention to how light and shadow define each plane.
  2. Use a Planar Head Model
    Many artists use 3D planar models or mannequins to practice. These tools simplify the face into geometric shapes, making it easier to understand the structure.
  3. Break Down the Face Step-by-Step
    Start by sketching the major planes, then gradually add the minor planes. Focus on how they connect and transition into one another.
  4. Experiment with Lighting
    Use a single light source to illuminate a model or reference photo. Observe how the light hits each plane and creates shadows.
  5. Practice Consistently
    Like any skill, mastering the planes of the face takes time and practice. Incorporate planar studies into your regular drawing routine.
The planes of the face

Tips for Applying Planes in Your Art

  • Start with a Basic Sketch: Outline the major planes before adding details.
  • Use Value to Define Planes: Darker shadows and lighter highlights will emphasize the three-dimensionality of the face.
  • Keep It Simple: Don’t overcomplicate the planes—focus on the most essential shapes first.
  • Study Master Artists: Look at how artists like Leonardo da Vinci, Andrew Loomis, or George Bridgman approached the planes of the face.
The planes of the face

Conclusion

Mastering the planes of the face is an essential skill for any artist who wants to create realistic, dynamic portraits. By breaking down the face into its fundamental shapes, you can better understand its structure, improve your proportions, and bring your artwork to life.

So, grab your sketchbook, study those planes, and watch your portraits transform! 🎨✨

The planes of the face